Template Instructions

Applying Your Lacuna Template

Use this draft guide to move your processed PrintedEdges template into Lacuna, check its placement across the book, and prepare a finished export.

Download Your Template

Open the purchased project and save the Lacuna Template file where you can find it.

Add It In Lacuna

Open the matching book and use Lacuna's template-placement workflow to add the file.

Review And Export

Inspect page coverage and edge orientation before exporting the production file.

1

Watch The Lacuna Walkthrough

2

Before You Begin

Collect the template and confirm the book details before changing anything in Lacuna.

  • Use the Lacuna Template project that matches this book's trim size and page count.
  • Download the purchased production file from the Available Downloads area in Projects.
  • Keep an unchanged copy of the downloaded template available while testing the workflow.
  • Open the correct Lacuna book project and confirm its production settings before import.
3

Apply The Template

1

Download The Correct File

Open the purchased project and download the Lacuna Template production file to a location you can easily find.

2

Open The Matching Book

Confirm the Lacuna project belongs to the same title and uses the trim size and page count selected in PrintedEdges.

3

Add The Template

Use the Lacuna template-placement controls documented in the final walkthrough to import and apply the file across the intended pages.

4

Review And Export

Inspect the complete book for missing pages, unexpected scaling, and reversed artwork before exporting the production PDF.
4

Follow Along With Screenshots

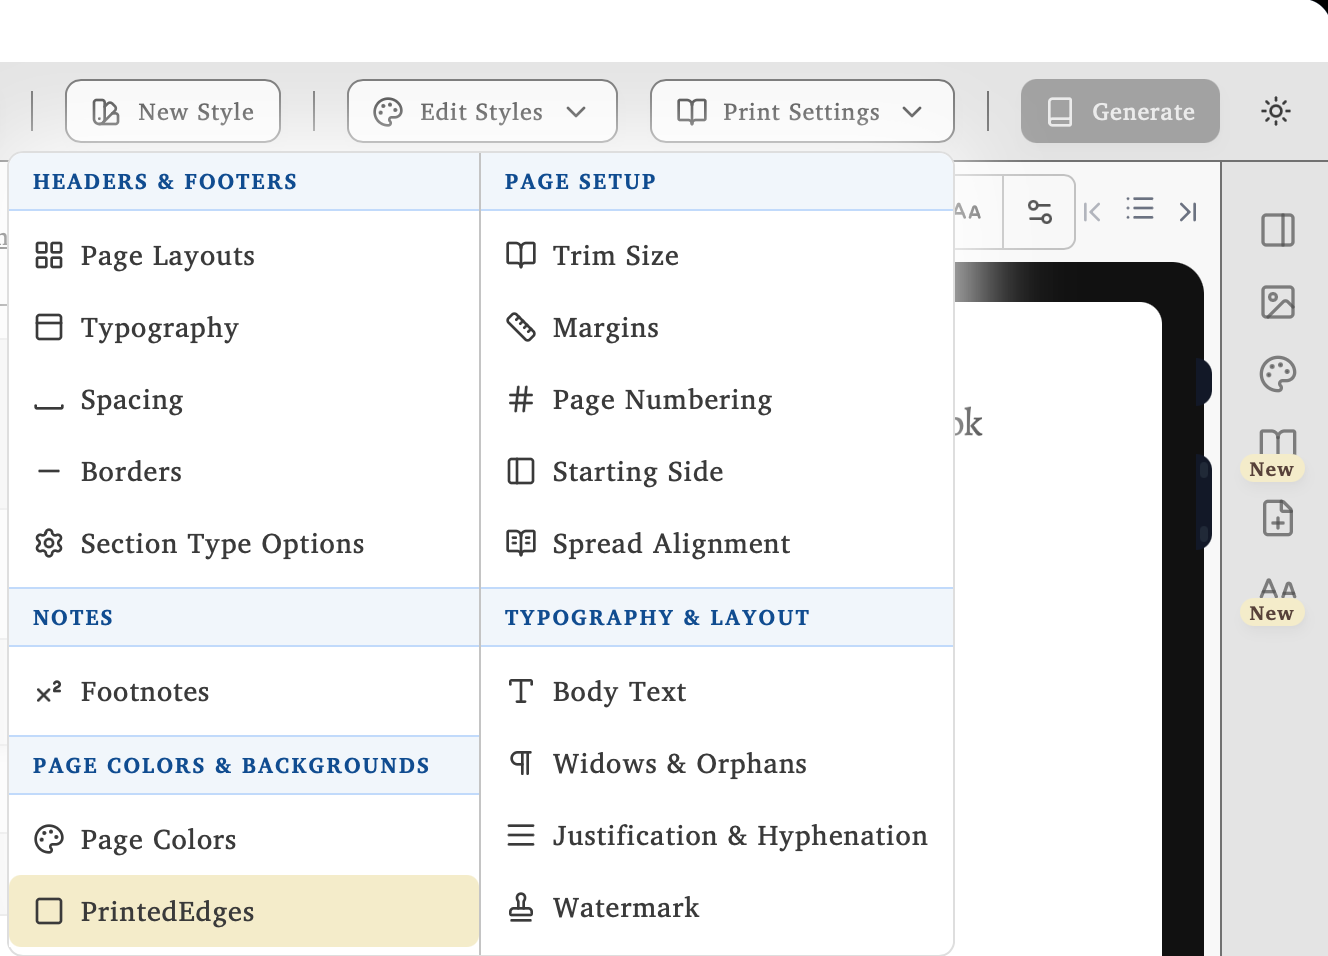
Lacuna Print Settings menu with the PrintedEdges option highlighted
Open Print Settings, then choose PrintedEdges under Page Colors & Backgrounds.
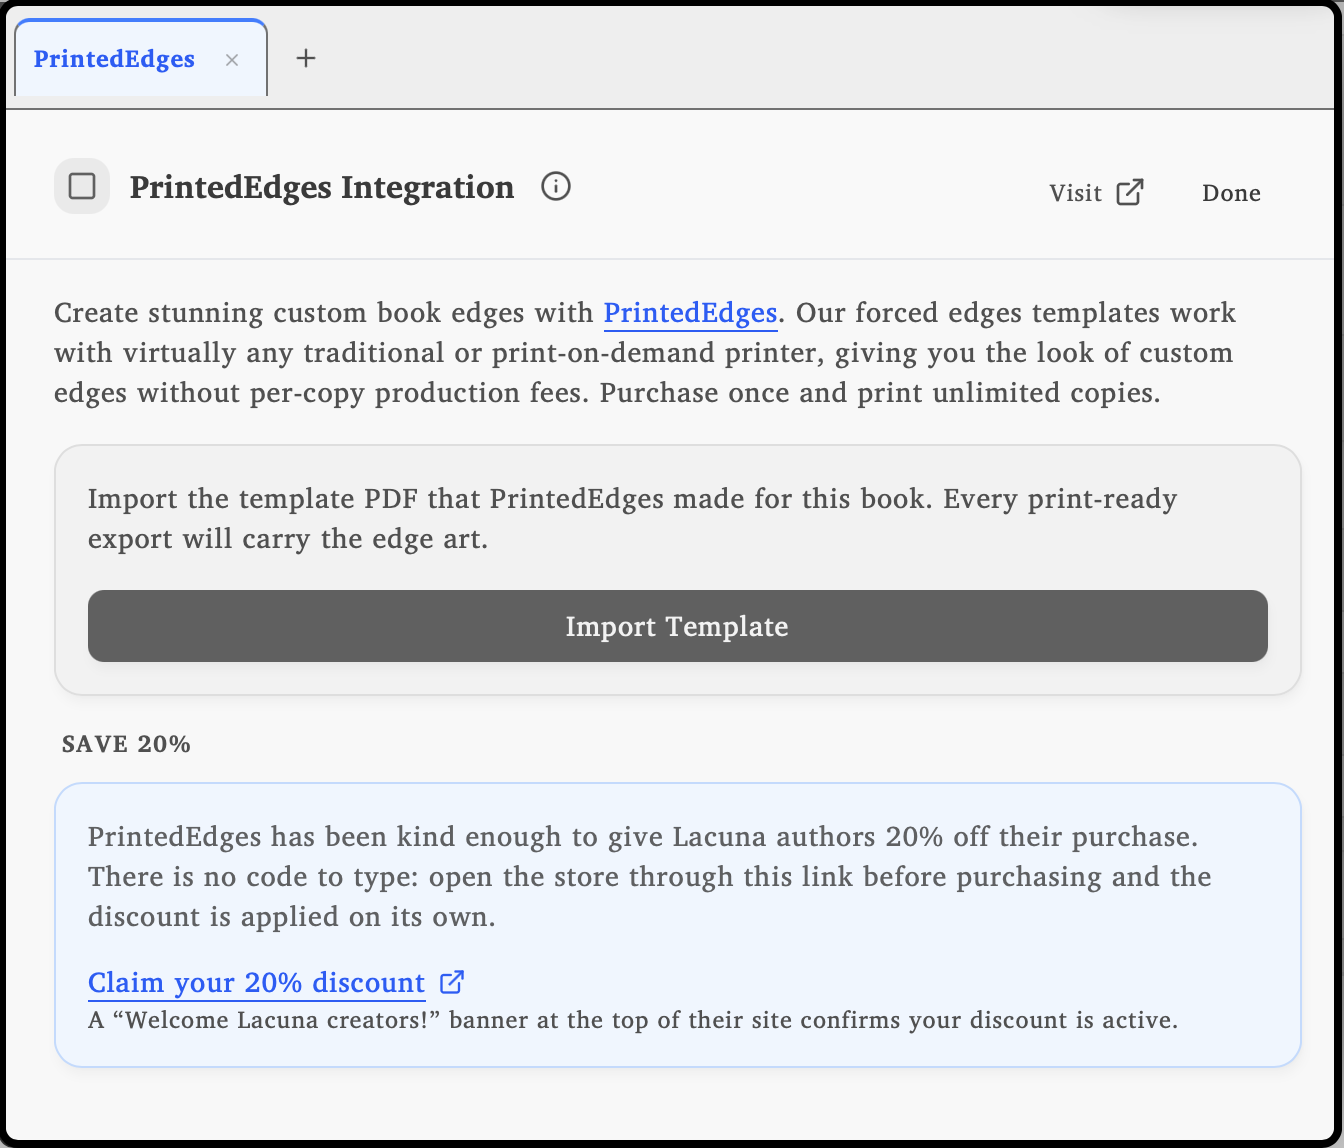
Lacuna PrintedEdges Integration panel with the Import Template action
Use the PrintedEdges Integration panel to import the template PDF created for this book.
5

Review The Finished Book

Complete this final check before sending the exported file to a print provider.

  • The template covers every intended page and no page range was skipped unexpectedly.
  • The edge artwork faces the expected direction and stays clear of important page content.
  • The trim size, page count, bleed, and color settings match the planned print project.
  • The exported PDF passes the PrintedEdges PDF Validator before printer upload.
Need the full production checklist?

Continue to Getting Your Edge Design Ready For Print for download, validation, printer-upload, and proof-copy guidance.