Create Custom Printed Edges in the V3 Edge Creator
Build your next gorgeous book project from a print-ready PDF or begin our template workflow, apply edge styles, generate a proof, purchase the final processed file, and capture marketing assets all from one guided workspace.
The 3D preview helps you design and inspect the book, but the generated proof is the file to review before purchase. You can start entirely for free before signing in. However, saving, purchasing, credits, and long-term access require a free account.
Use these screens to learn where work happens: the left workflow panel controls the active step, the center 3D preview supports visual inspection, and the right inspector changes with setup, proof, purchase, or marketing tasks.
Left Workflow Panel
The left panel is where the active step is configured. Work from the top of the panel down so required project data, style settings, proof checks, or marketing settings are applied in order.
Project Data sizes the book before style work begins.
Styles holds pending design changes and artwork until they are applied.
Validate, Purchase, and Marketing expose different controls as the project progresses.
Center 3D Preview
The center preview helps you inspect the book while you build. Use it for visual checks, camera positions, lighting, backgrounds, and marketing scene setup.
Drag or use camera presets to review front, side, top, bottom, and edge views.
Use the preview as a design aid, then review the generated proof before purchase.
Right Inspector
The right inspector changes with the selected step. It may show preview sizing, style settings, proof output, checkout progress, or marketing export options.
Check the inspector before advancing because it often contains the final confirmation controls.
After proof generation, downloads and proof-based preview options appear here.
Workflow Rail
The top rail shows the five creator steps and the current workflow status. Treat it as a progress map, not just navigation.
Project Data and Styles should be confirmed before validation.
Purchase unlocks after proof review and design confirmation are complete.
Marketing exports are available at any time.
Workspace Actions
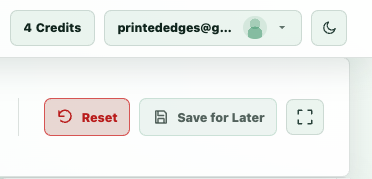
The action area includes reset, save-for-later, and fullscreen controls. These are recovery and workspace controls, not style settings.
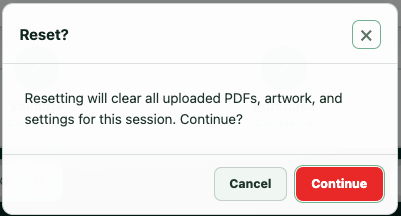
Reset asks for confirmation before clearing uploaded files, artwork, and settings.
Save for Later requires an account so the draft can be reopened from Projects.
Fullscreen gives more room for the panels and 3D preview while editing.
Display Preference
Dark mode and light mode only change how the workspace looks while you edit. They do not change proof files, purchased downloads, or marketing exports.
Use the display mode that makes screenshots and controls easiest to inspect.
File output is controlled by project data, styles, proof generation, and purchase state.
Tab 1
Project Data
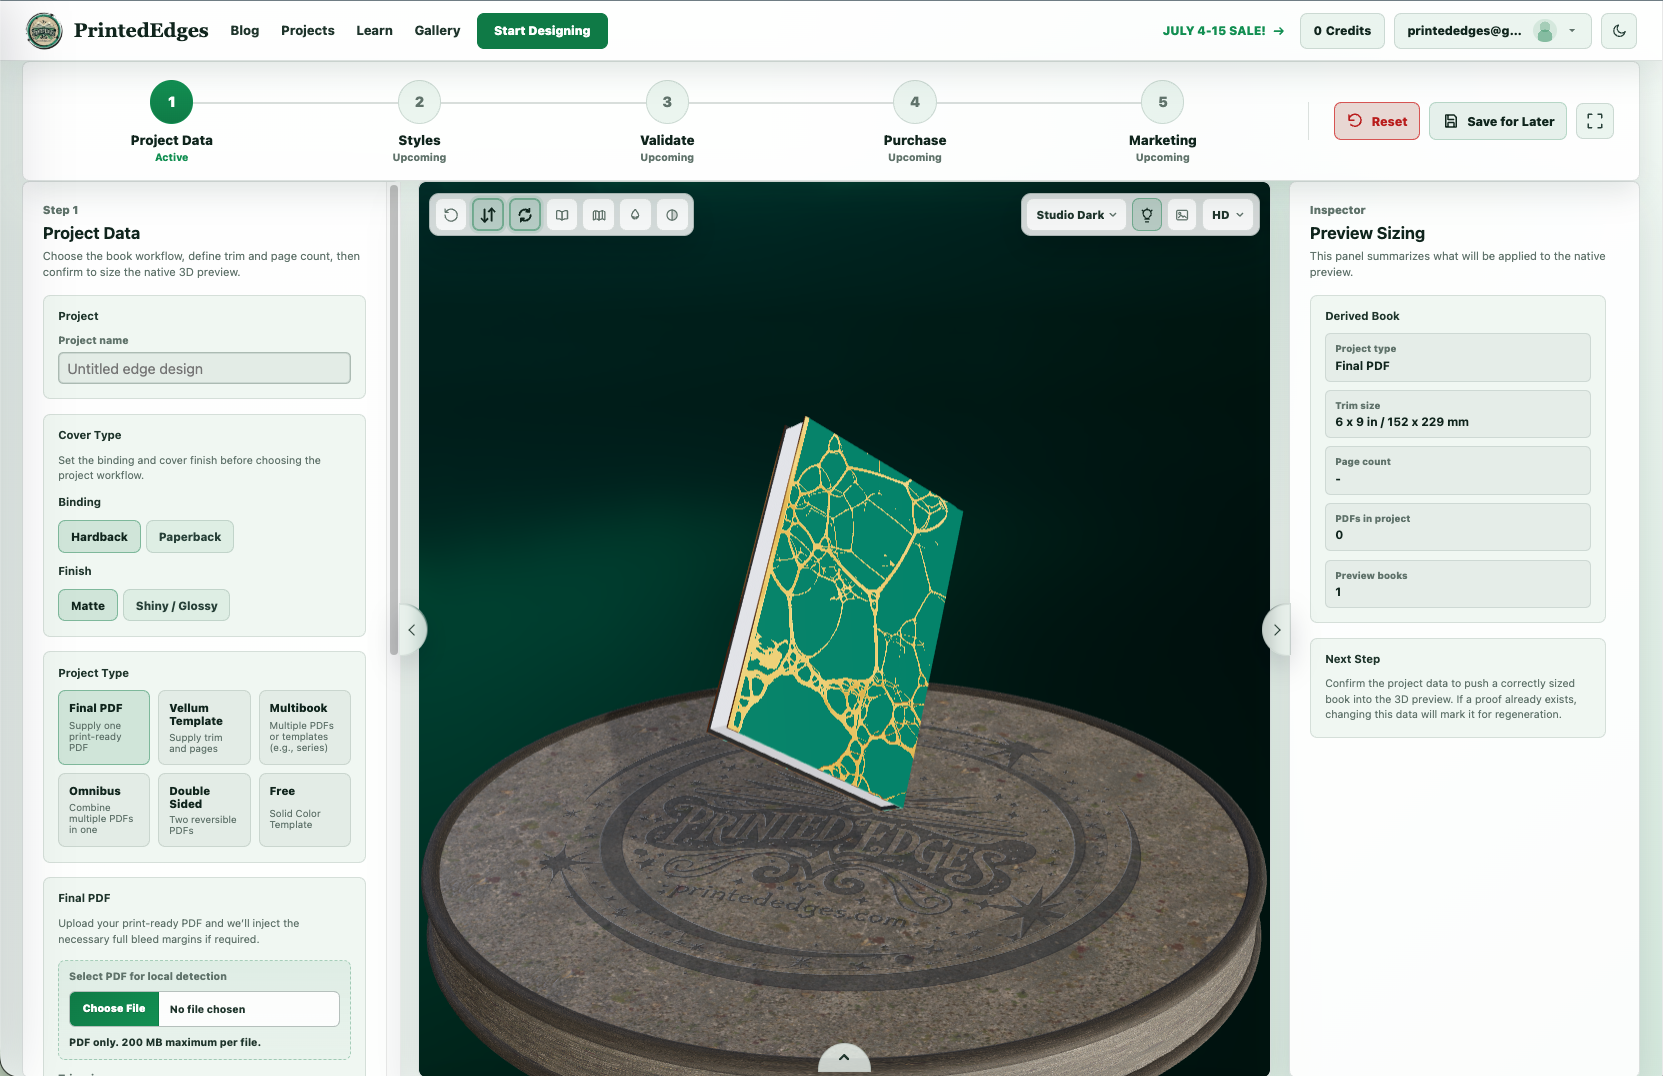
Start by naming the project, choosing the book setup, selecting the project type, and confirming the preview dimensions used by every later step.
Choose binding, finish, cover type, and the project workflow before styling begins (this can be changed later).
Use local PDF detection for print-ready PDFs, or enter trim size and page count for template workflows.
Review bleed handling and the Preview Sizing inspector before confirming the 3D preview.
The native 3D previewer sits beside the setup flow, so these controls are useful before and after the main creator tabs.
3D Previewer
The 3D previewer is the shared visual workspace for setup, style review, validation checks, and marketing scene setup.
Use it to inspect the cover, fore edge, top edge, bottom edge, and overall book shape.
Treat it as a design aid, not the final proof artifact.
Camera, environment, and animation controls help you inspect specific details without leaving the workflow.
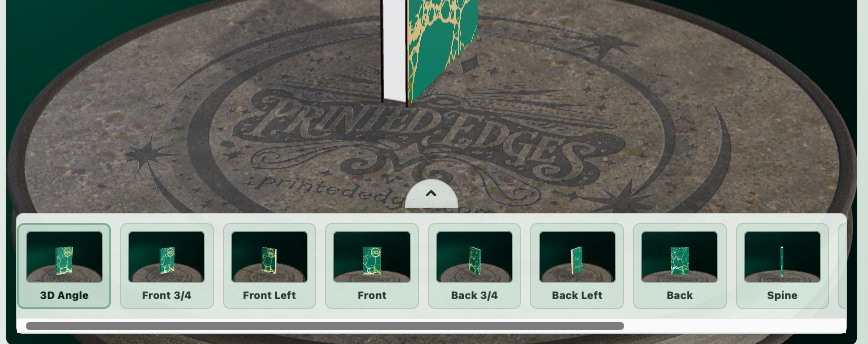
Camera Positions
Camera thumbnails jump the preview to common inspection angles.
Use angled views to inspect the book shape and front cover together.
Use fore-edge, top-edge, and bottom-edge views to check edge artwork placement.
Camera presets help you review details quickly before proof generation or marketing capture.
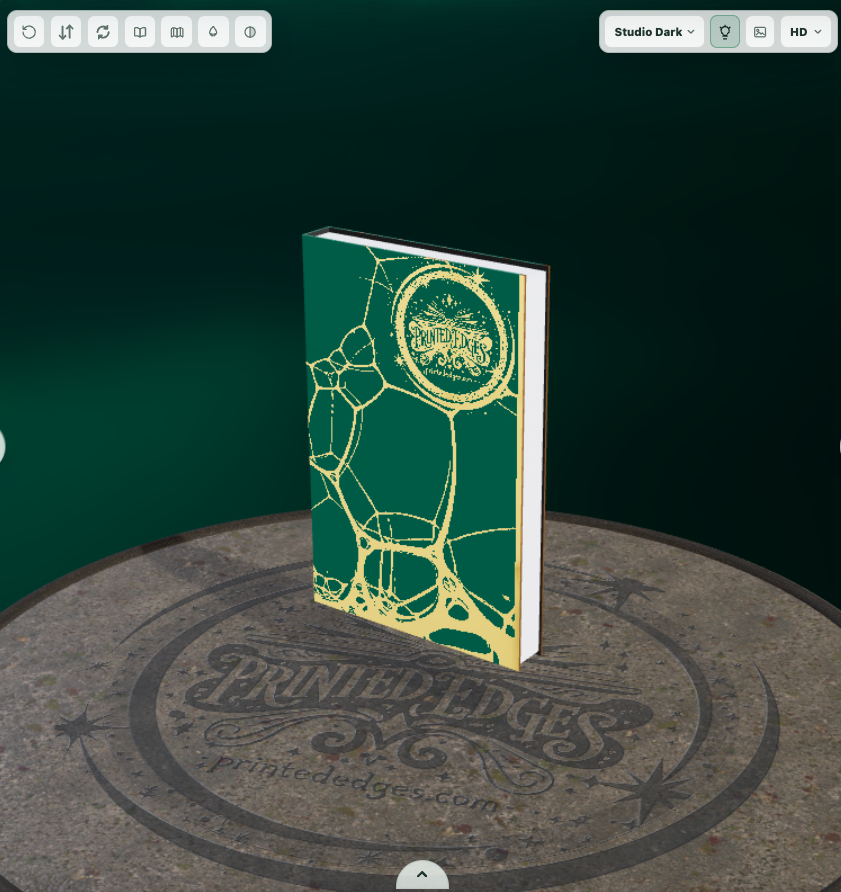
Environment Bar
Use the environment toolbar to change the preview scene, reflections, background, and render quality without leaving the main creator flow.
Lighting ScenarioSwitches between Studio Dark, Studio Light, Warm Spotlight, Cool Blue, Library HDRI, Neon Split, and Stage Spot scenes.
HDRI ReflectionsTurns the HDRI reflection and matching lighting effect on or off for the native 3D preview.
Custom BackgroundUploads a background image for the preview and marketing captures.
HD / SD ModeChooses quality mode for sharper review or performance mode for faster interaction.
Animation Bar
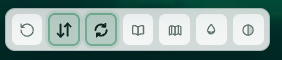
Use the animation toolbar to reset the book pose and toggle the motion or inspection states used in the preview.
ResetReturns the book and camera to the default preview pose.
BounceTurns the subtle up-and-down book motion on or off.
RotateTurns the automatic rotation loop on or off.
Open HardbackOpens or closes the hardback cover when the project uses a hardback product view.
Dust JacketOpens or closes the dust jacket preview when jacket artwork is configured.
Edge SaturationToggles stronger edge color saturation so artwork is closer to final printed output.
Black and WhiteSwitches edge artwork into a black-and-white preview for contrast checks.
Save and Fullscreen
These workspace controls handle project recovery, account saving, and a larger editing view.
ResetClears the current project settings after a confirmation warning.
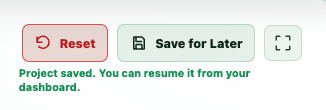
Save for LaterStores the project in your account so it can be reopened from Projects.
FullscreenExpands the creator workspace and preview for a larger editing surface.
Save Requires Sign In
Save for Later requires sign-in because saved projects are tied to your account.
You can start designing before signing in.
Saving a draft needs an account so the project can be reopened from Projects later.
Purchasing and credit checkout also require account access so final files and credit history stay attached to the right profile.
Reset Warning
Reset warnings protect you from clearing uploaded PDFs, artwork, and settings by accident.
Use Reset only when you want to clear the current project and rebuild it from the beginning.
The confirmation explains that uploaded files and style settings will be removed.
Save the project first if you want to keep the current draft before resetting.
Change Project Warning
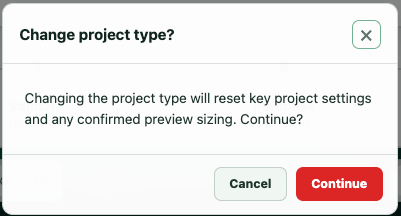
Change-project warnings explain that switching the workflow type can reset key project settings.
You will see this warning when changing workflow type can invalidate existing setup choices.
Continue only if you are ready to review project data and style setup again.
If a proof already exists, changing the project setup means you need to regenerate and review the proof before purchase.
Deep Dive
Screen-by-Screen Interface Notes
Use these grouped screenshots to learn what each screen controls, what to review before moving forward, and where downloads or account tools appear.
Project Data
Set Up the Book, Source Files, and Workflow
Project Data is the foundation for the whole creator flow. This step tells the preview and proof generator what kind of book is being built, how large it is, and which source files or template settings should drive the final output.
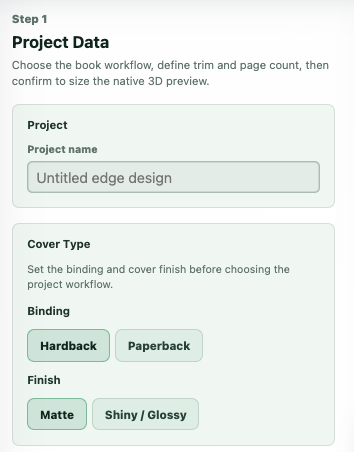
Start with the project name, binding, finish, and cover type so the 3D preview matches the expected physical book.
Choose the project workflow before uploading or entering book details because each workflow exposes different required fields.
For PDF workflows, you can upload your PDF for automatic detection or manually enter the values, then confirm trim size, page count, bleed handling, and preview sizing before moving into Styles.
If project data changes after a proof exists, the project will need to be regenerated before purchase.
Project Basics
Name the project and choose the basic physical setup before selecting a workflow.
Binding controls whether the preview uses a hardback or paperback product view.
Finish controls the visual treatment you expect for the cover while you inspect the project.
These basics help the 3D preview match the intended final book before proof generation begins.
Project Workflow Type
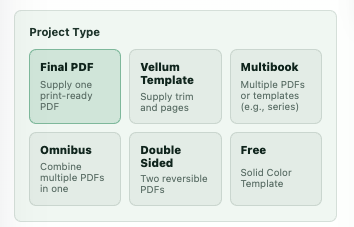
Choose the workflow that matches the output you need before upload and style controls are filled in.
Final PDF, Omnibus, and Double Sided workflows use uploaded PDFs.
Vellum Template and Free workflows are built from trim size and page count instead of a finished interior PDF.
Multibook projects can use uploaded PDFs or Vellum template entries.
Changing project type resets key setup choices because later fields depend on this selection.
Final PDF Workflow
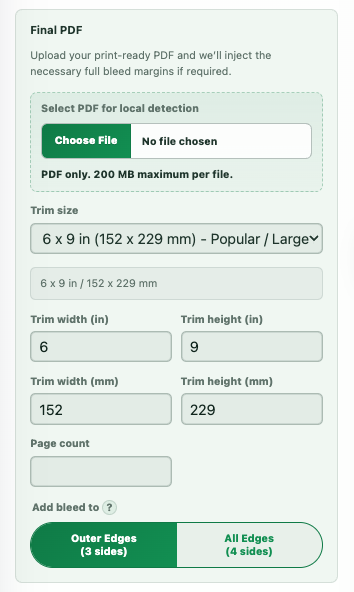
Use Final PDF when you already have one print-ready interior PDF.
Upload one interior PDF and let the app read trim size and page count before confirmation.
Use this path when the manuscript layout is already finished and the edge design should be embedded into that file.
Review detected values carefully before confirming the preview.
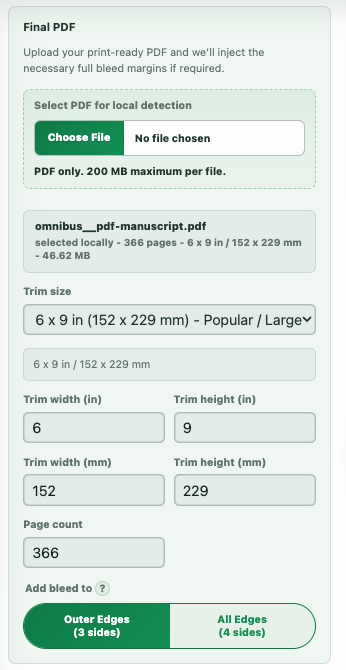
Populated Final PDF Setup
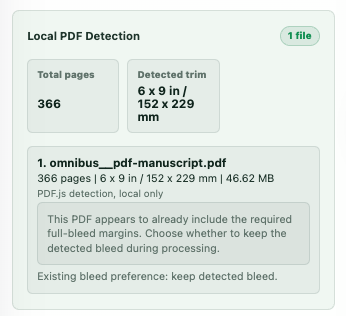
After a PDF is selected, the Project Data panel shows the uploaded file state and the values you should review before confirming.
Confirm the selected file is the intended print-ready interior PDF.
Review detected or entered trim, page count, and bleed settings before updating the preview.
Use this populated state to connect file selection with the preview sizing summary.
Vellum Template Workflow
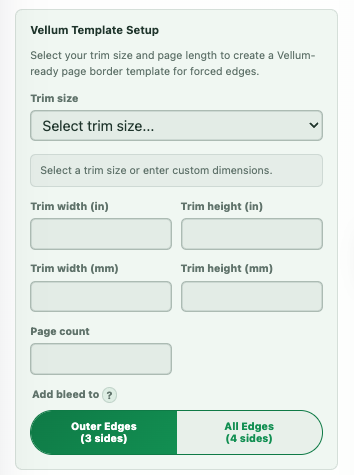
Use Vellum Template when you need a template to bring back into Vellum.
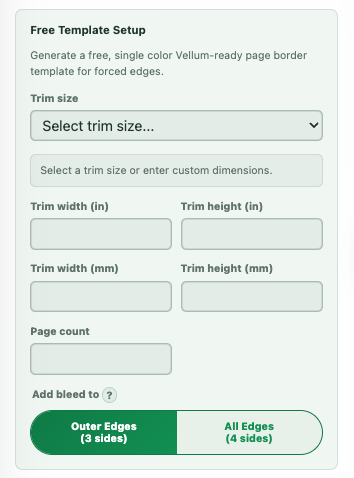
Enter trim size and page count manually instead of uploading a finished interior PDF.
This creates a Vellum-ready page border template that matches the selected book dimensions.
Confirm the page count before styling because it affects the proof and final generated file.
Multibook Workflow
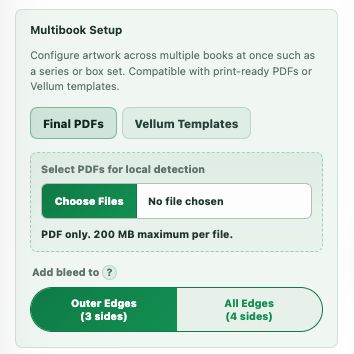
Use Multibook for a series, set, or multiple related books that should share a coordinated edge design.
Add each PDF or template entry as its own book in the set.
Confirm every book has the correct trim size and page count before proof generation.
Use this path when related books should be prepared together but remain separate outputs.
Omnibus Workflow
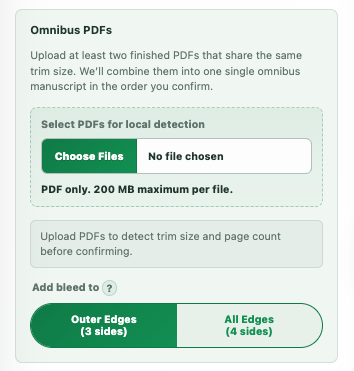
Use Omnibus when multiple same-trim PDFs should be combined into one larger finished project.
Upload the PDFs that belong in the combined project.
Review the combined structure before purchase because the final file is treated as one larger book.
Keep trims consistent across the source PDFs so preview sizing and proof generation remain predictable.
Double Sided Workflow
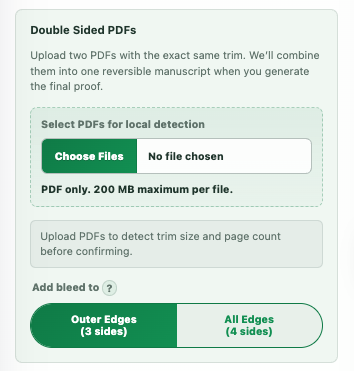
Use Double Sided for reversible designs that need different forward and backward reading directions.
Upload exactly two PDFs with matching trim so each direction can be generated correctly.
Use this path when the front-to-back and back-to-front views need separate source files.
Confirm both files before moving into Styles.
Free Template Workflow
Use Free when you only need a solid-color page border template.
Enter trim size and page count just like the template workflow.
Only free-compatible settings are available in this path.
Use this when a simple solid-color edge template is enough.
PDF Detection
For PDF workflows, the app reads trim size and page count locally first so you can confirm the source file before proof generation.
Detection helps you catch trim, page count, and bleed assumptions early.
Files are not sent through proof generation until you reach the validation step.
Use the detected values or correct them before confirming the 3D preview.
Bleed Review
Review bleed handling before the preview is confirmed so the generated proof matches the intended print workflow.
Outer Edges supports three-side bleed workflows.
All Edges supports four-side bleed workflows.
Amazon and IngramSpark typically expect three sides of bleed, while BookVault and some other printers expect four sides. Confirm requirements with your printer of choice before designing.
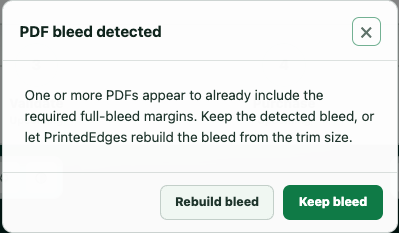
All forced edge designs require "full bleed" printing. If your PDF is still at standard trim size, PrintedEdges will add the required full bleed margin if it does not already exist.
If a PDF already includes the required bleed, keep the detected bleed instead of rebuilding it.
Preview Sizing
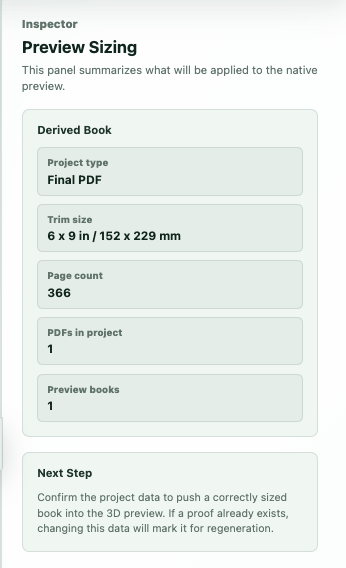
The Preview Sizing inspector summarizes the setup that will be applied to the native 3D preview.
Check project type, trim size, page count, PDF count, and preview book count.
These values affect the visible book dimensions and later proof-generation requirements.
Use the inspector as a final setup review before confirming.
Confirm Setup
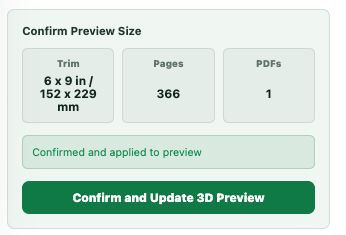
Confirm and update the 3D preview after the workflow, source data, trim size, page count, and bleed choices are ready.
Confirmation applies the setup to the preview and unlocks a cleaner path into Styles.
If required values are missing, resolve those fields before continuing.
Changing confirmed project data later can require proof regeneration before checkout.
Styles
Choose and Confirm Edge Treatments
Styles is where you choose the edge treatments that will be applied when the proof is generated. This is the best place to understand which features are available, which ones cost credits, and what must be applied before moving into validation.
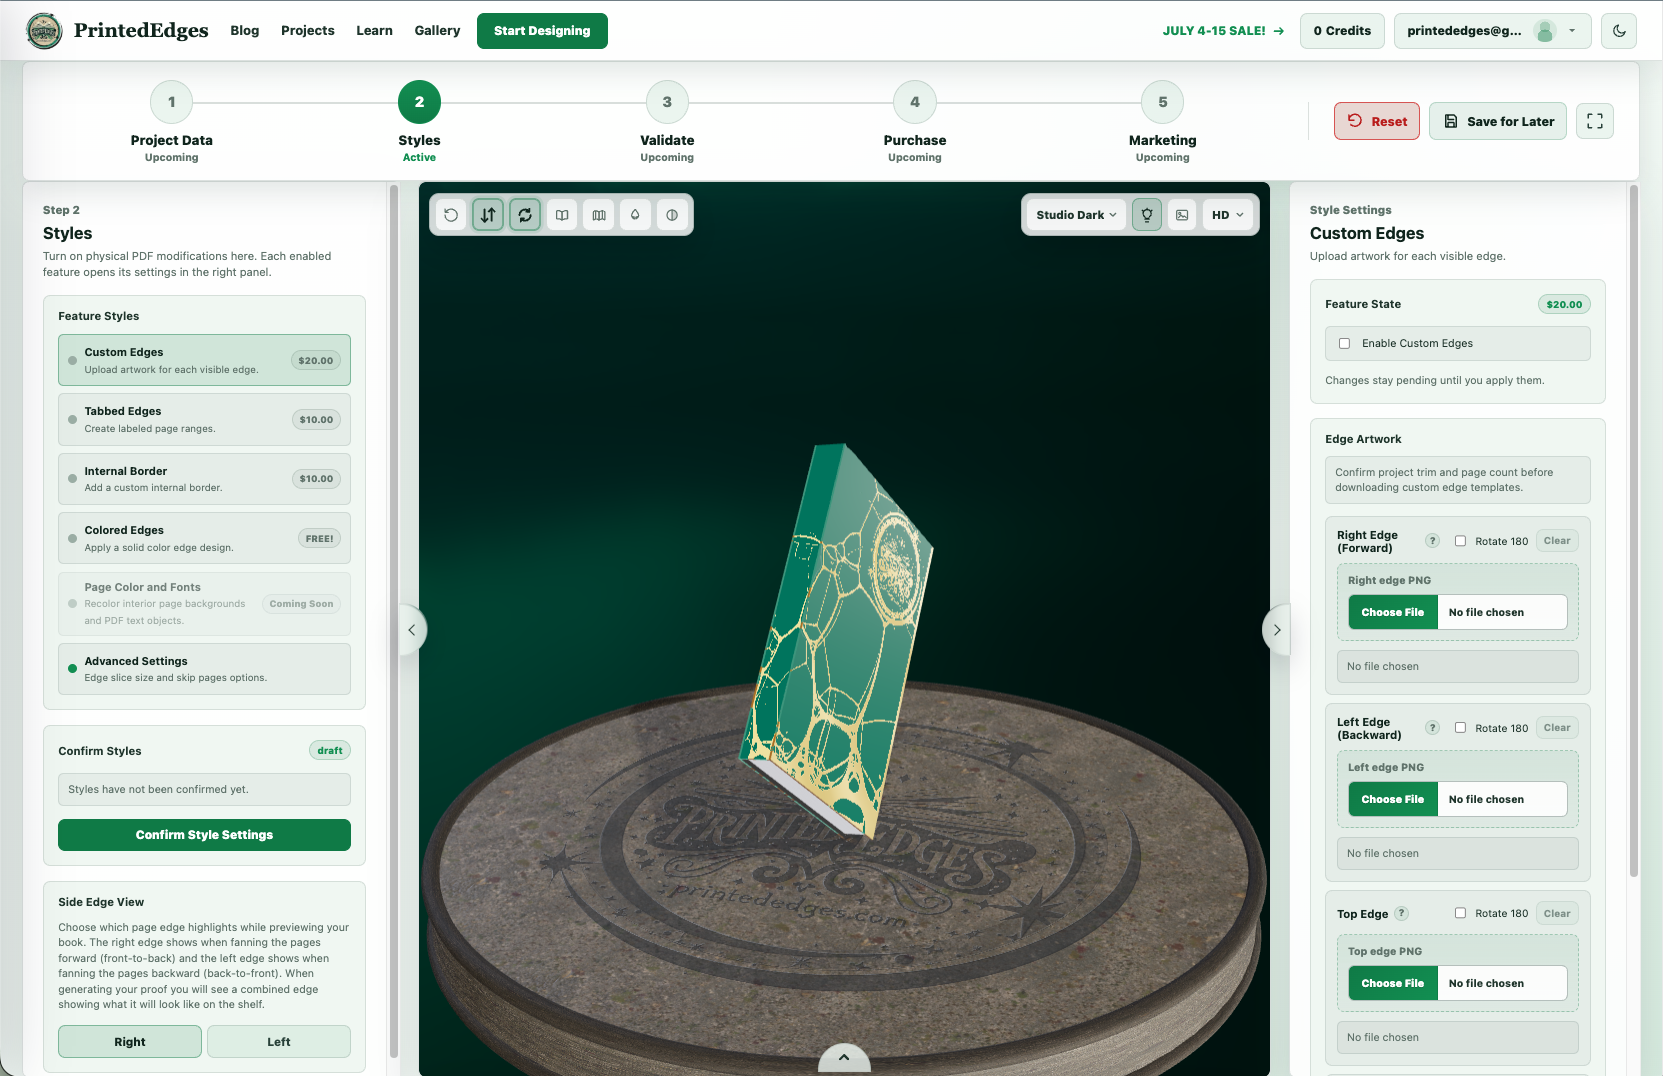
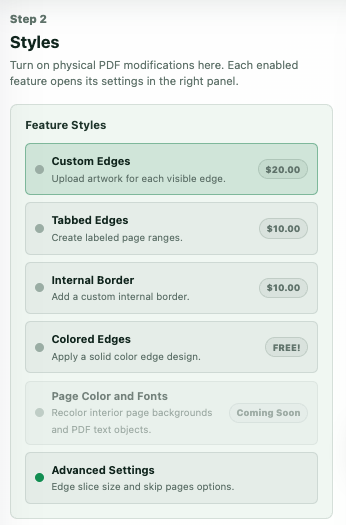
Review the feature cards first so Custom Edges, Tabbed Edges, Internal Border, Colored Edges, and Advanced Settings are understood before upload work starts.
Style changes can remain pending until you apply them from the right settings panel, so confirm the active feature settings.
Use the 3D preview as a layout check, but rely on proof generation for the final validation of tabs, borders, edge artwork, and generated PDF output.
Confirm style settings before moving into validation so the proof uses the intended style recipe.
Project Style Features
These cards show which style systems are available before you start uploading artwork or confirming the design.
Custom Edges: upload artwork for the visible page edges.
Tabbed Edges: create labeled page ranges for section or chapter tabs.
Internal Border: add a custom border treatment inside the PDF pages.
Colored Edges: apply a solid edge color when artwork is not needed.
Page Color and Fonts: coming soon and not currently available for normal projects.
Advanced Settings: adjust edge size and skip-page behavior for more specific layouts.
Custom Edges
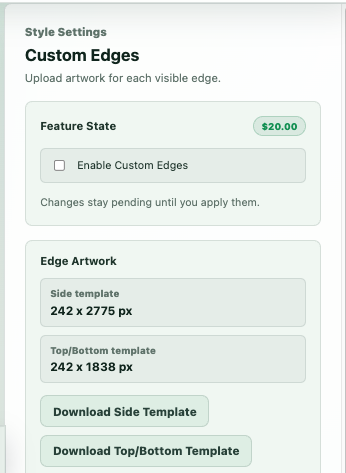
Custom Edges is the primary artwork feature for designs that should appear on the visible page edges.
Enable the feature before downloading templates or uploading edge artwork.
Use the side template for fore-edge artwork and the top/bottom template for top and bottom edge artwork.
Templates help artwork match the selected trim size and page count before proof generation.
Edge Artwork Uploader
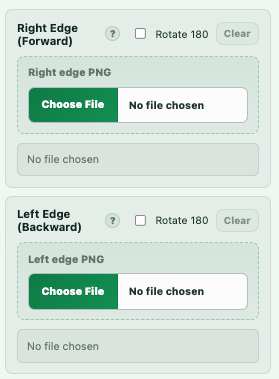
Upload edge artwork for the forward and backward page-fanning directions.
Use one file in both upload locations when you want a consistent image fanning forward and backward.
Use separate right-edge and left-edge images when the design needs different artwork in each direction.
Rotation controls help align artwork without requiring you to re-export the source image.
Colored Edges
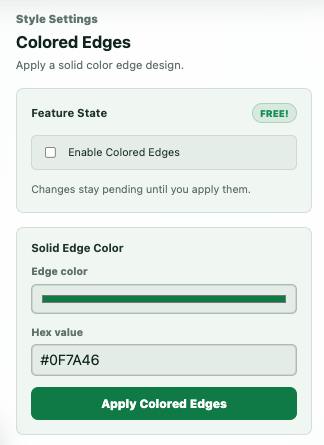
Colored Edges applies a solid color edge treatment when a project does not need uploaded artwork.
Use the color picker or hex value to choose the edge color.
This is useful for simple sprayed-edge style projects or quick color-matched templates.
Confirm the color setting before generating a proof.
Tabbed Edges
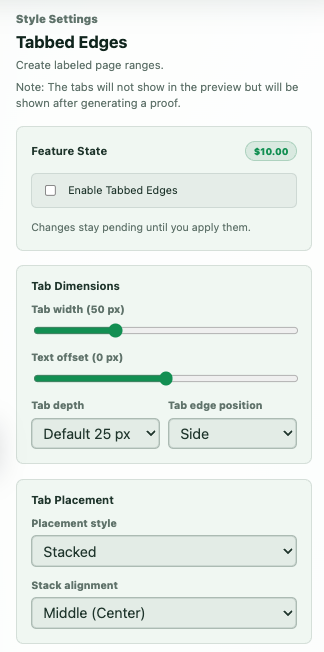
Tabbed Edges creates labeled page ranges for sections, chapters, bonus material, or other visible index-style markers.
Set tab dimensions, placement, page ranges, and label styling from the settings panel.
Tabs do not show in the live 3D preview.
Generate a proof to review the actual tab output before purchase.
Internal Border
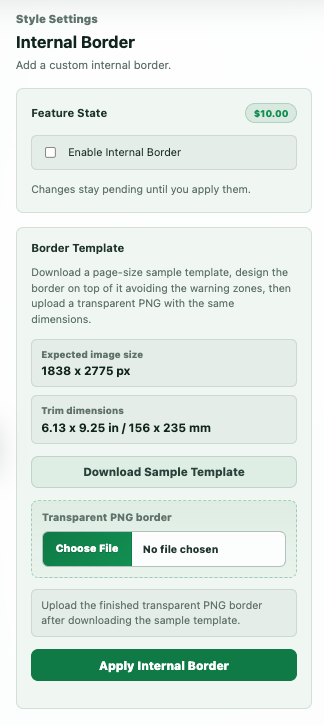
Internal Border adds a custom transparent PNG border treatment inside the PDF pages.
Download the sample template before preparing artwork so the border fits the selected trim.
Use transparent PNG artwork when the page content should remain visible inside the border.
Review the generated proof to confirm the border placement across the interior pages.
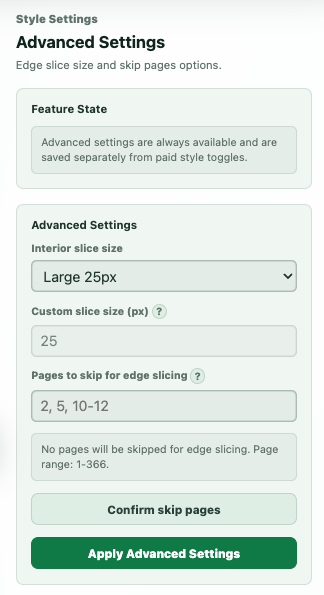
Advanced Settings
Advanced Settings fine-tunes edge slice size and skip-page behavior for projects with special layout needs.
Edge slice size changes how much of each page contributes to the visible edge artwork.
We recommend staying with the "Large" edge slice until you have evaluated your specific printer.
Skip-page controls help avoid applying edge treatments to pages that should remain untouched.
Only adjust these settings when the default proof needs more precise handling.
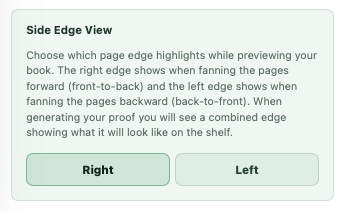
Side View
Side Edge View lets you inspect the right and left edge artwork before the proof is generated.
Right previews the forward page-fanning direction.
Left previews the backward page-fanning direction.
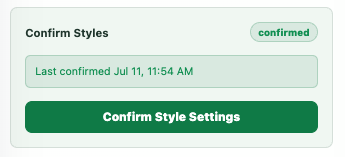
Confirm Styles
Confirm Style Settings applies the selected style recipe before you move into validation.
Confirm after upload, color, tab, border, or advanced settings are ready.
Unconfirmed style changes can leave the proof using an older configuration.
If styles change after a proof exists, regenerate the proof before purchase.
Validate
Generate and Review the Proof
Validate is the quality-control stage. It turns the configured project into a generated proof, then gives you a place to download, inspect, and confirm that proof before purchase.
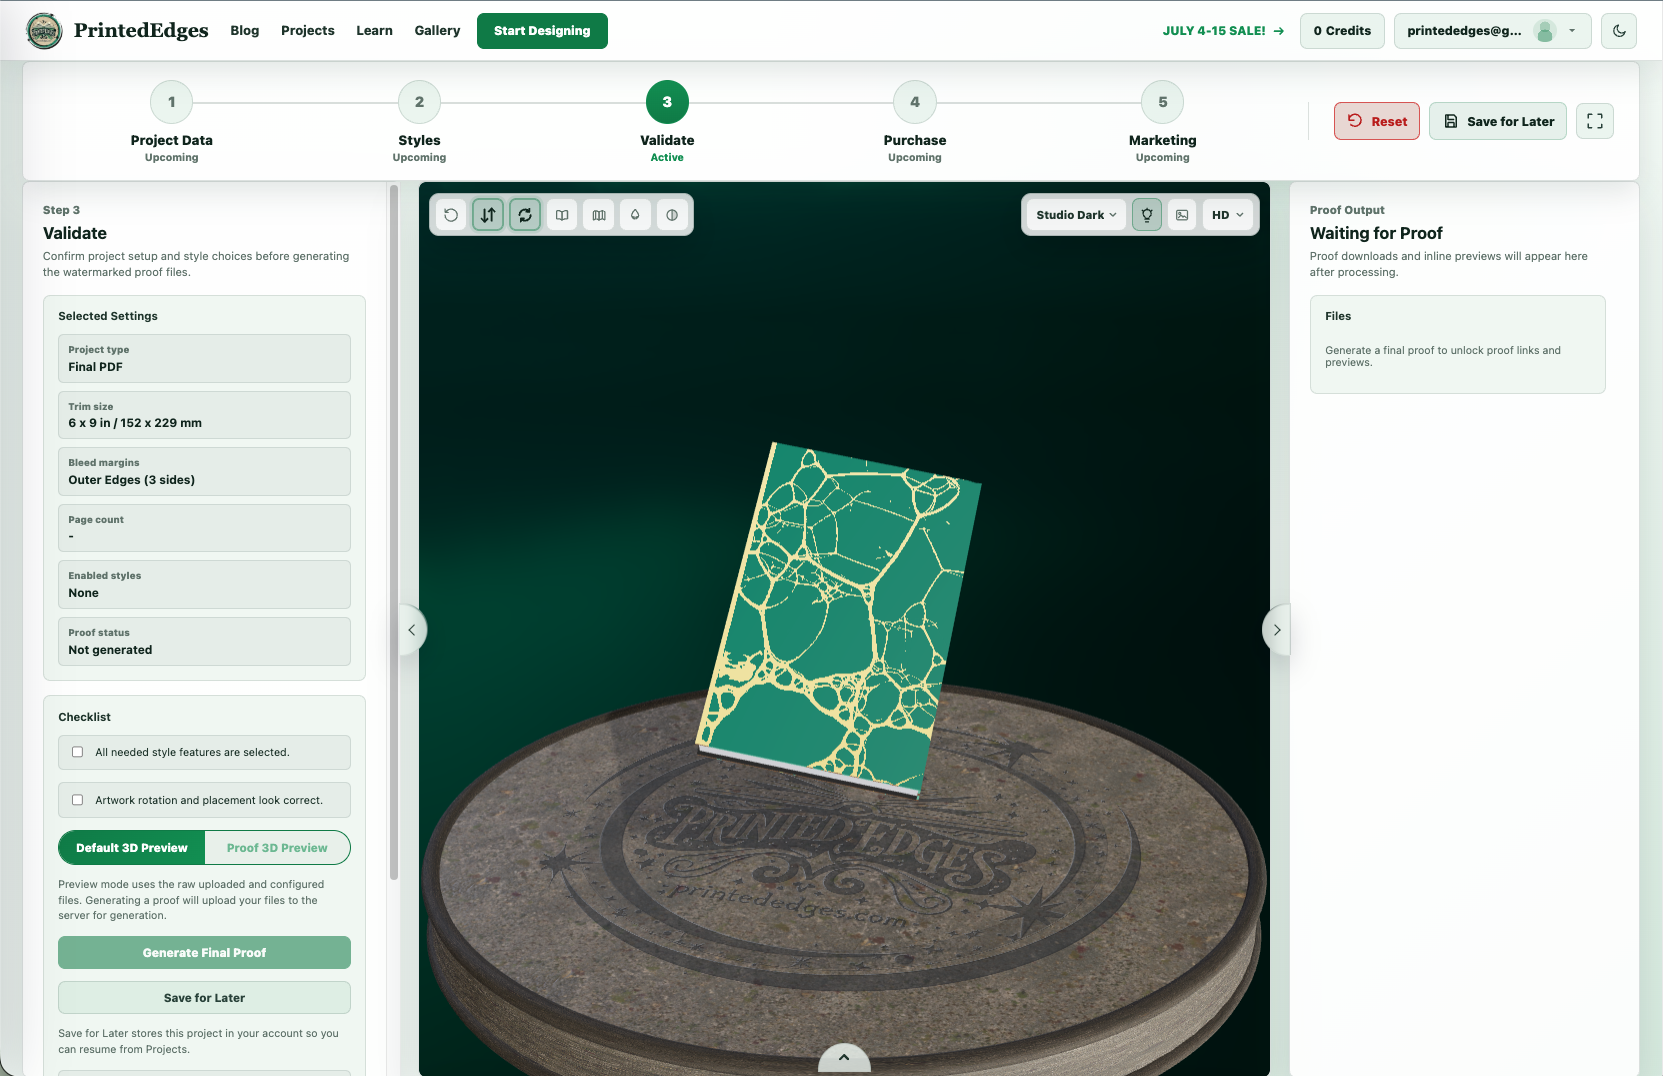
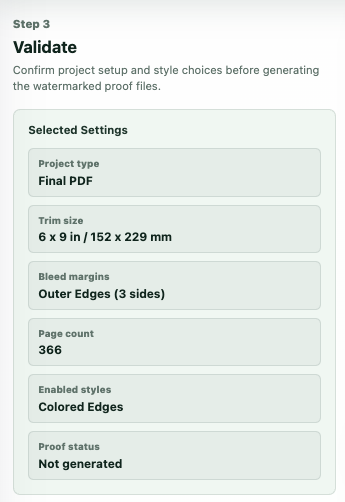
Use the settings summary as a preflight checklist for project type, trim size, bleed, page count, enabled styles, and proof status.
Check artwork rotation and placement before generating so the proof starts from the intended setup.
Proof generation uploads the required project files and may take time while backend processing prepares the output.
Download and review the PDF proof and edge preview files before confirming the design.
Settings Summary
The summary brings the selected setup into one preflight view before proof generation.
Review project type, trim size, bleed margins, page count, and enabled styles.
Use this as the final settings check before files are processed.
If something is wrong, return to Project Data or Styles before generating the proof.
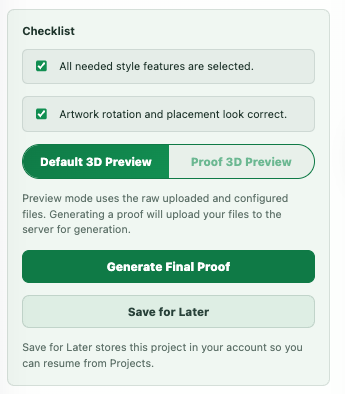
Checklist
The checklist helps you confirm that the important review steps are complete before generating a proof.
Confirm all needed style features are selected.
Check artwork placement and rotation in the preview.
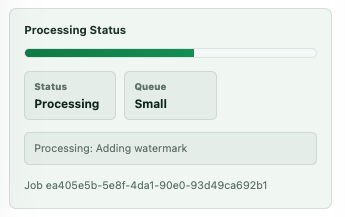
Processing
Processing states show that proof generation is underway and provide more detail about the current proof-generation step.
The page may stay in this state while uploads, queue work, and PDF generation complete.
Use the visible status details to understand whether the job is uploading, queued, processing, or waiting on proof assets.
Keep the page open while progress is active.
If processing fails, return to the prior setup step and retry after reviewing required fields.
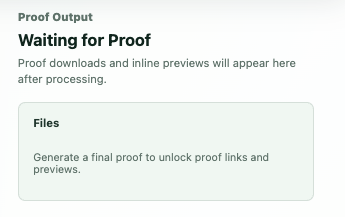
Waiting for Proof
Waiting states explain that your project has been submitted and the proof is not ready yet.
Watch progress until downloads become available.
The proof should be reviewed once the ready state appears.
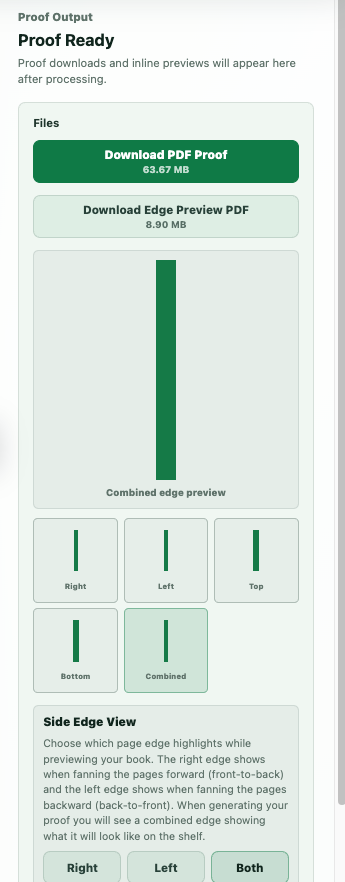
Proof Ready
Proof Ready is where you download the generated review files.
Download the watermarked PDF proof for page-by-page review.
Download the edge preview PDF to inspect visible edge output.
Use the generated proof as your final review file before purchase.
Proof Preview Toggle
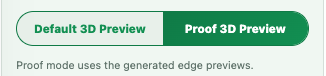
Once proof assets exist, you can switch between the default 3D preview and the proof-based preview view.
Default 3D Preview shows the live design preview used while configuring the project.
Proof 3D Preview uses generated proof assets so you can inspect the processed output state.
Make sure and inspect the proof preview closely. If you see an issue here, then you will see it in your final print.
The proof preview is generated from your actual PDF after PrintedEdges applies the edges, which is the same review process used in the PDF Validator tool.
Use the proof-based view after generation, then confirm the design only after reviewing the downloaded proof files.
Proof Edge Review
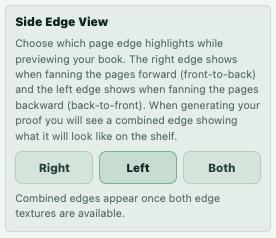
Use the side-edge proof controls to inspect how the artwork will appear on the right edge, left edge, or combined proof view.
Right shows the artwork used when pages fan forward.
Left shows the artwork used when pages fan backward.
Both shows the combined edge output; it will match when the same image is used in both directions and look merged when separate artwork is used.
Review Required After Changes
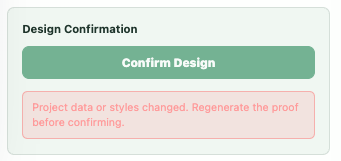
If project data or styles change after a proof exists, the Validate step should make it clear that another proof is required.
Generate a new proof after changing setup or style choices.
Purchases will stay blocked until the updated proof has been reviewed and confirmed.
Confirm Design
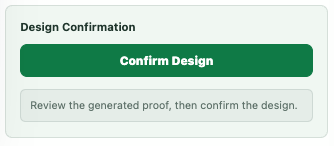
Confirm Design should happen only after the generated proof has been downloaded and reviewed.
The live 3D preview is helpful, but it is not a substitute for proof review.
Confirming the design unlocks the purchase path when all required review steps are complete.
Any later project-data or style change should send you back through proof generation.
Purchase
Review, Redeem, and Finalize
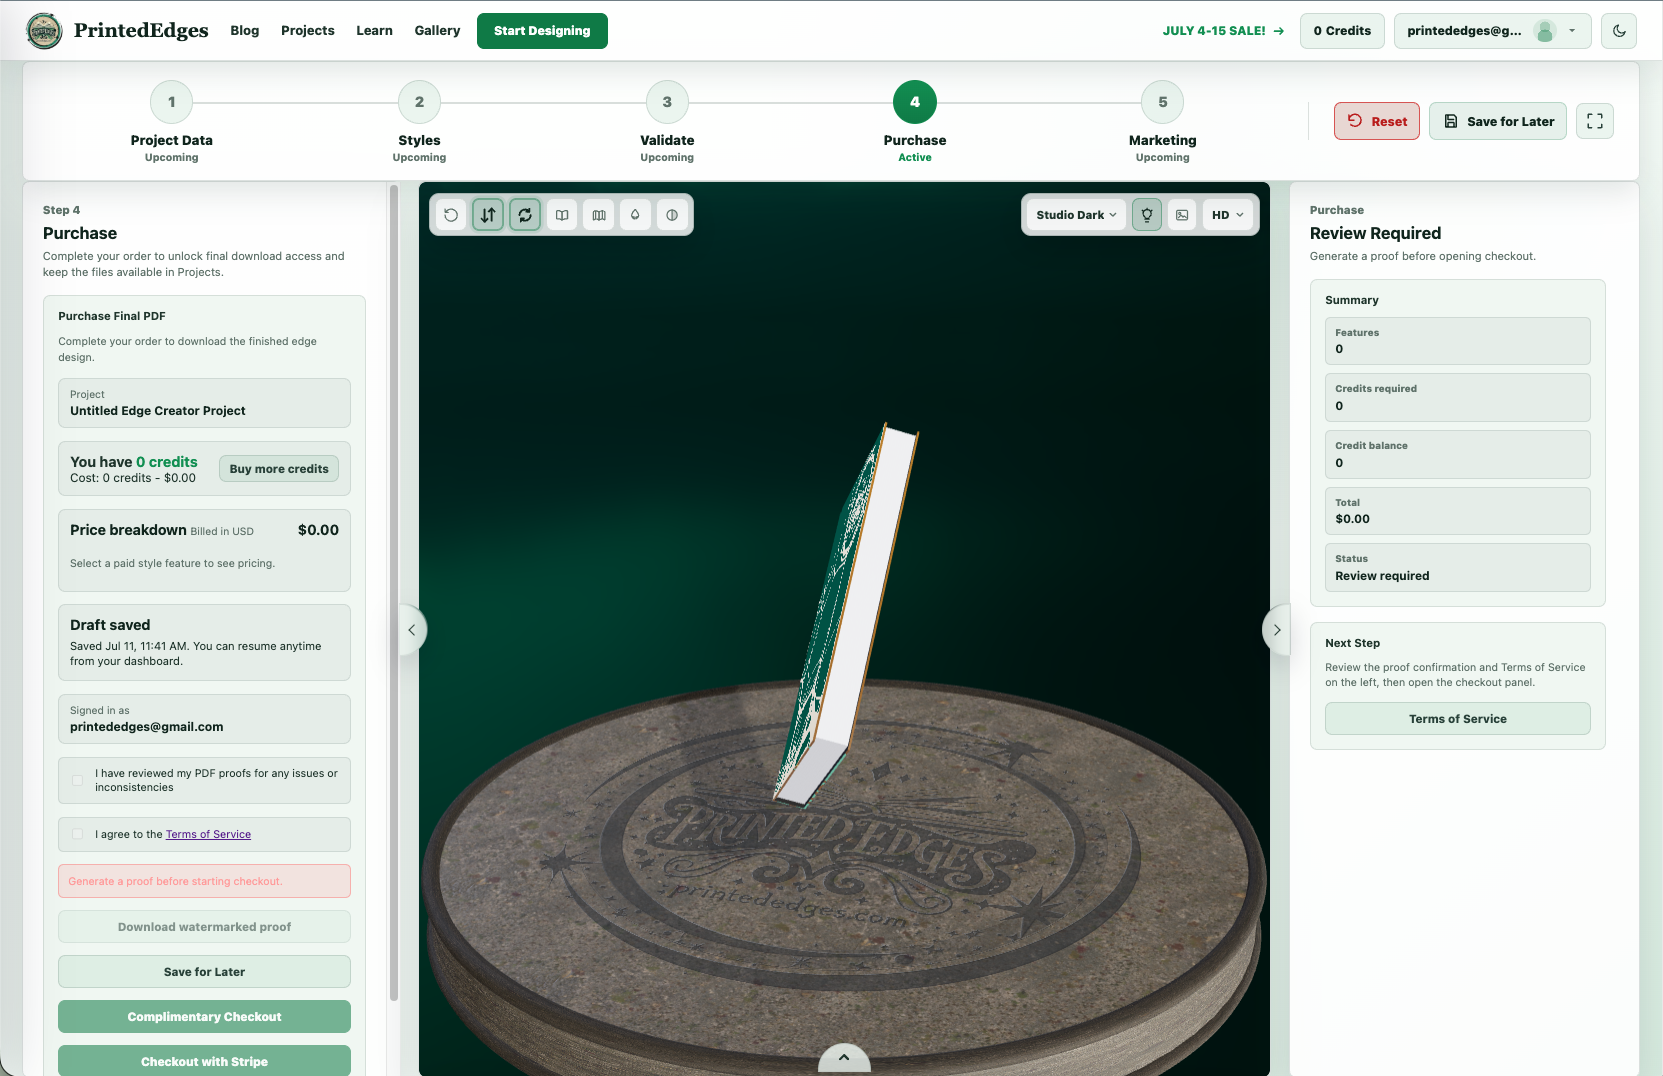
Purchase is the final unlock step. It should make the proof-review requirements, project summary, credit balance, price breakdown, agreement checks, and final file access clear before checkout begins.
Purchase unlocks only after proof generation, proof review, design confirmation, and required agreement checks are complete.
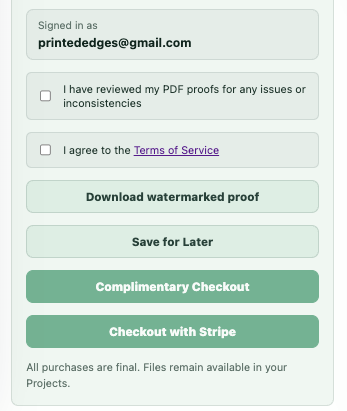
You can download the watermarked proof before checkout so you can review the exact proof artifact first.
Checkout may use credits, a credit purchase path, Stripe card payment, or eligible complimentary checkout.
After purchase, final files remain available from the purchase result and your profile.
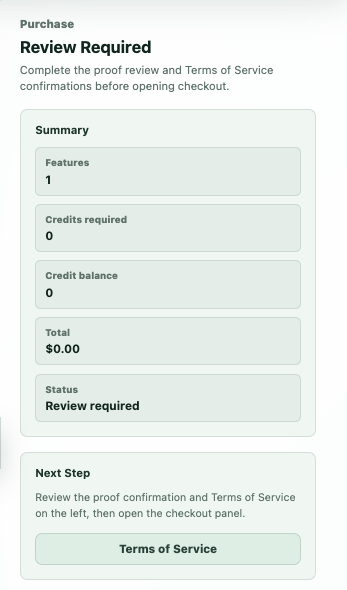
Purchase Blocked by Review
Purchase stays blocked until the required proof review and design confirmation steps are complete.
Use this state to return to Validate when the current proof is missing or outdated.
Review-required messaging should be explicit before any checkout option is available.
This protects you from buying final files before checking the latest generated proof.
Purchase Review
The review panel shows whether your project is ready for checkout or still blocked by proof-review requirements.
Generate and download the proof before checkout.
Confirm the design after proof review.
Use blocked states to return to validation instead of letting checkout start too early.
Price Breakdown
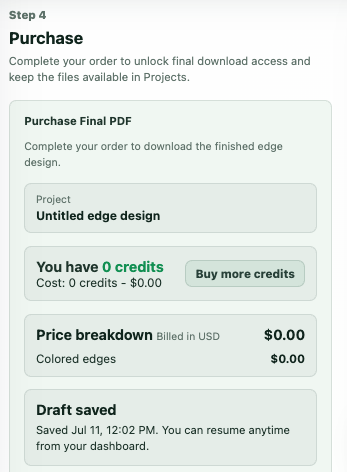
The price breakdown explains the project cost, credit balance, and what the purchase unlocks.
Show the style features and credit cost clearly.
Separate available credits from any amount still owed.
Use this area to reduce surprises before payment.
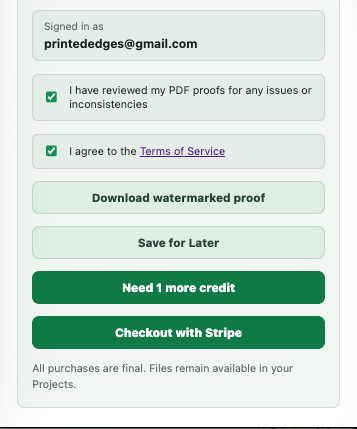
Agreement
Agreement controls make the final review responsibilities explicit before the project is finalized.
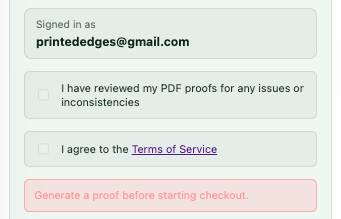
Confirm that you reviewed the generated PDF proof.
Agree to the Terms of Service before checkout.
These checks help make clear that purchased projects are treated as final.
Credit Checkout
Credit checkout lets you redeem account credits when your balance covers the project cost.
Use this path when enough credits are already available.
The checkout still finalizes the same project and final file access.
Credit checkout should remain tied to the signed-in account.
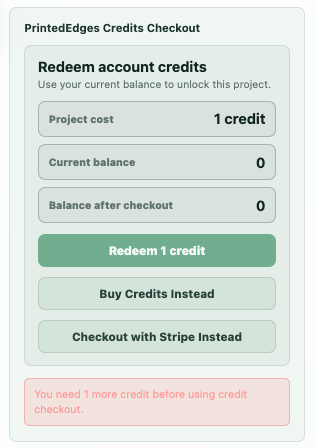
Credit Details
Credit detail panels explain how many credits are available and whether more credits are needed before checkout.
Show available balance and required project cost together.
Use the buy-credits path when your balance does not cover the project.
Keep the payment path clear without hiding the proof-review requirements.
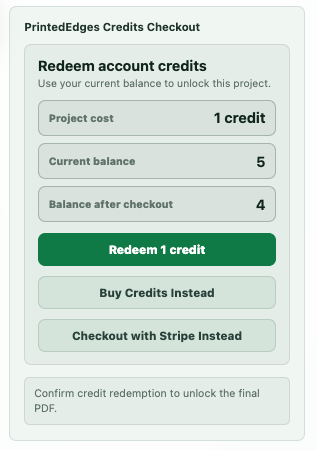
Redeem Credits
Redeem Credits is the final confirmation before account credits are applied to the purchase.
Use this when the account has enough credits for the project.
Confirm redemption after proof review and agreement checks are complete.
After redemption, you receive the same final download access as paid checkout.
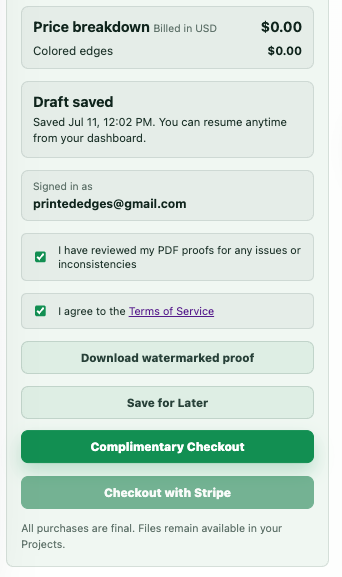
Complimentary Checkout
Complimentary checkout handles eligible no-cost project states while still requiring the same proof review and finalization discipline.
Use this path only when the project is eligible for no-cost checkout or regeneration.
You still need to review the proof and confirm the design before finalization.
After complimentary checkout, final file access should work like any other completed purchase.
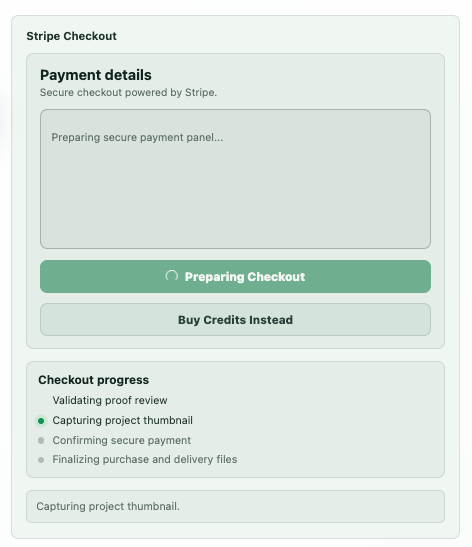
Stripe Checkout
Stripe checkout is the card-payment path when you are purchasing the project directly.
Use this path when credits are unavailable or you prefer card payment.
The project should already be proof-reviewed before opening the payment flow.
Finalization returns you to download access once payment is complete.
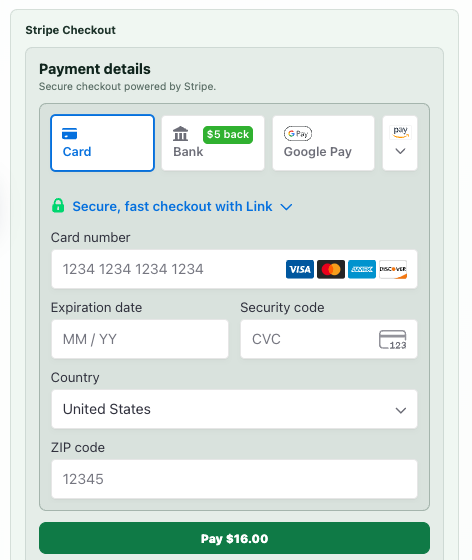
Stripe Checkout Page
The full checkout page handles secure payment details outside the creator workspace.
Complete card payment through Stripe.
After checkout, the project returns to the finalized purchase state.
The creator should preserve the project context while payment completes.
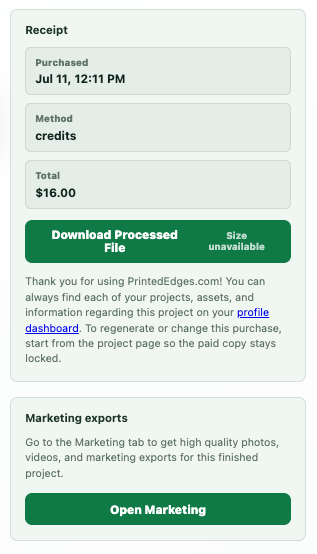
Finalized
The finalized state orients you toward final downloads and future profile access.
Download the purchased final processed file from the completion state.
Use the profile dashboard later to find final files again.
Future edits should happen through supported copy or regeneration paths rather than overwriting the purchased record.
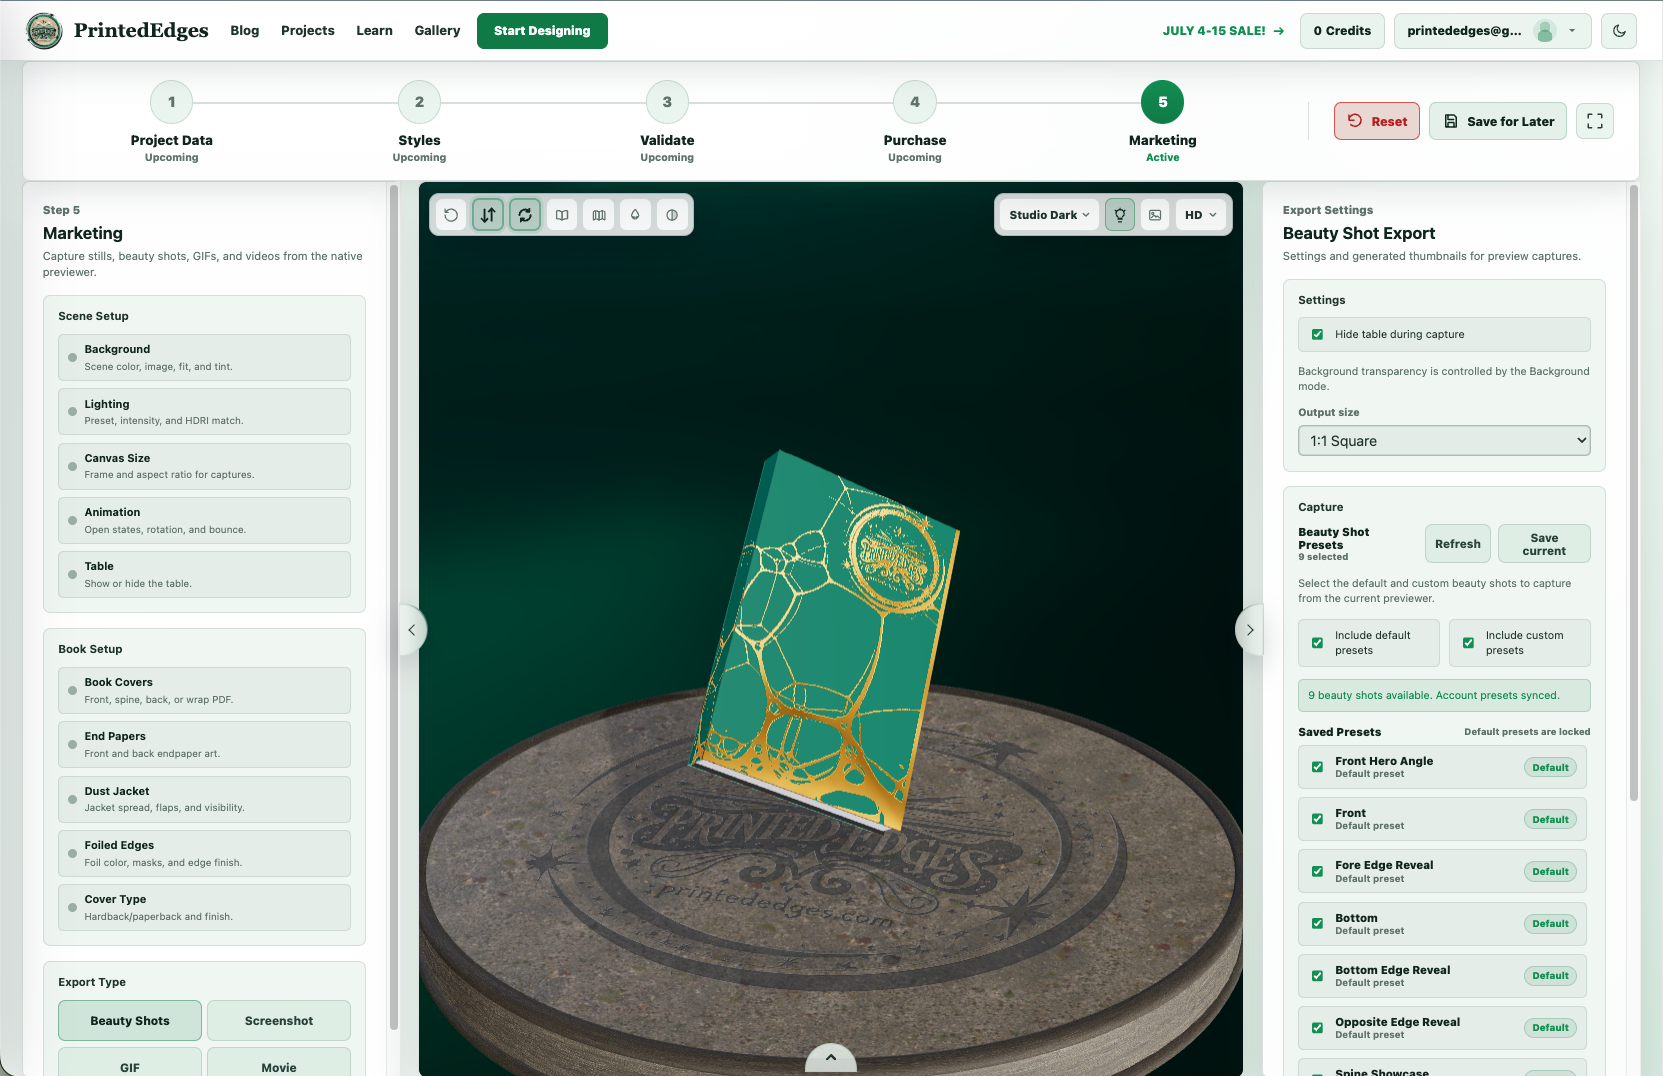
Marketing
Set Up the Marketing Scene and Book
Marketing tools let you create promotional assets from the V3 preview scene. This section explains that marketing captures are separate from proof generation and purchase, but they can use the same prepared project, scene, and book setup.
Scene setup defines the background, lighting, canvas, animation, and table state used by screenshots, beauty shots, GIFs, and movies.
Book setup controls covers, endpapers, dust jackets, foiled edges, cover type, and book motion for marketing captures.
Confirm the scene before exports so still images and videos inherit the same look.
Use this step for launch graphics, teasers, ads, and social content after the design is ready.
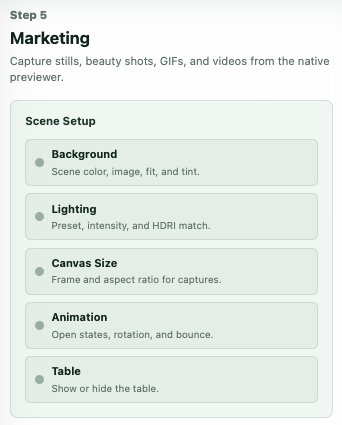
Scene Setup
These setup cards define the base visual environment used by the marketing capture tools.
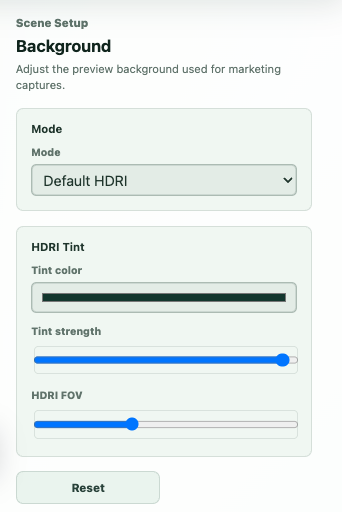
Background: choose the scene color, image, fit, and tint.
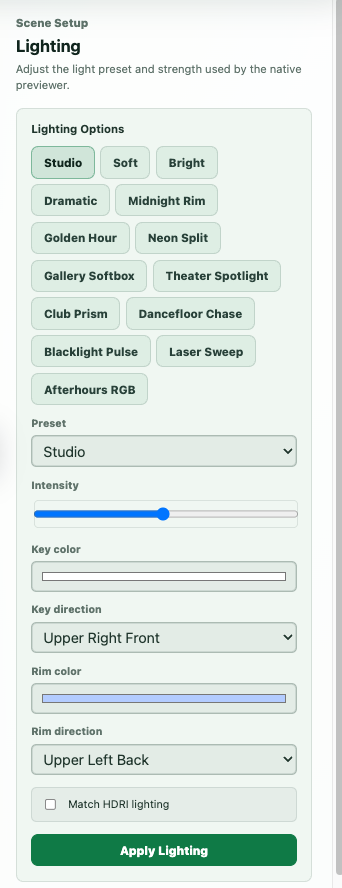
Lighting: select the lighting preset, intensity, and HDRI match.
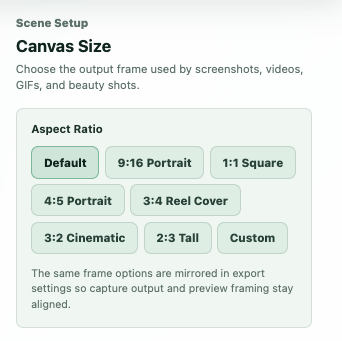
Canvas Size: set the frame and aspect ratio for captures.
Animation: control open state, rotation, and bounce.
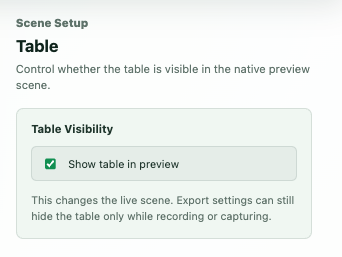
Table: show or hide the table surface.
Canvas
Canvas controls set the export frame used by screenshots, videos, GIFs, and beauty shots.
Choose common social sizes such as square, portrait, cinematic, reel cover, or custom dimensions.
Match the canvas to the channel where the asset will be posted.
Use the same frame between preview and export so captures stay predictable.
Background
Background controls set the color, image, fit, and tint behind the book.
Use a solid background for clean product shots.
Use a custom image when the campaign needs a branded or themed scene.
Check that text, artwork, and foiling remain readable against the chosen background.
Lighting
Lighting controls change the scene preset, intensity, and HDRI match used by marketing captures.
Choose lighting that makes the cover, edge artwork, and foil easy to inspect.
Use HDRI reflections when the capture should include richer scene reflections.
Keep lighting consistent across assets for the same campaign.
Table
Table controls show or hide the table surface under the book.
Use the table for grounded product-style shots.
Hide the table for cleaner floating or transparent-feeling captures.
Confirm the table setting before recording videos so the whole sequence uses the same base scene.
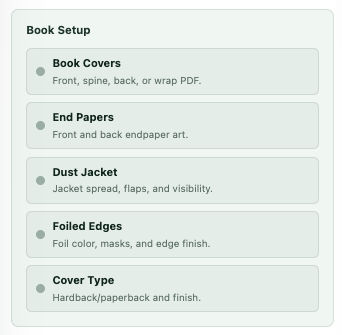
Book Setup
Book setup cards collect the book-specific controls that shape how the project appears in marketing captures.
Use these cards to move between cover, endpaper, dust jacket, foil, cover type, and motion controls.
Book setup affects screenshots, GIFs, and movies generated from the marketing scene.
Confirm book settings before choosing export presets so every capture uses the intended edition view.
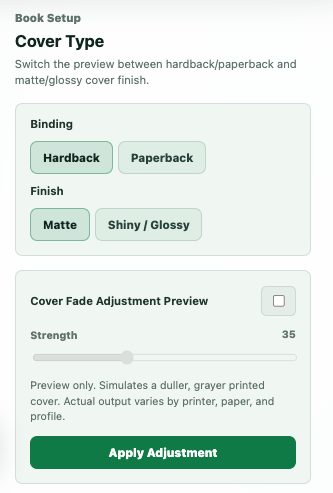
Cover Type
Cover Type controls let you align marketing captures with the physical version you want to show.
Choose the cover configuration that matches the edition being promoted.
Use cover type with dust jacket, endpaper, and motion controls for hardback-style marketing views.
Check the preview after changing cover type because the visible book shape can change.
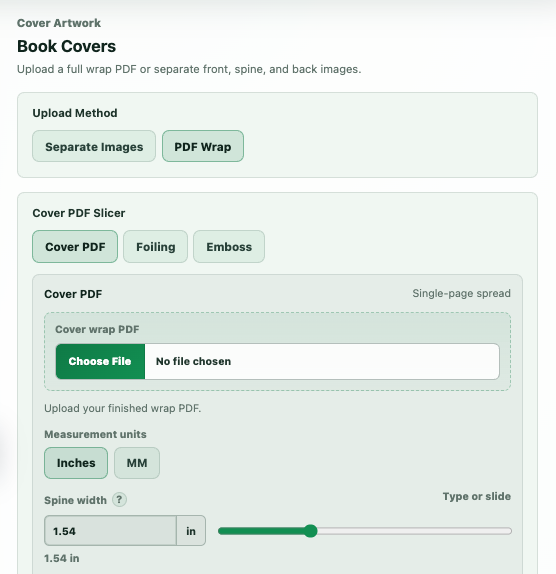
Book Covers
Book cover controls let you adjust which cover artwork is used in marketing captures.
Confirm the front cover is visible and correctly aligned.
Use the cover controls before beauty shots or video exports so captures show the intended edition.
Check the preview after changing cover settings because marketing output follows the current scene.
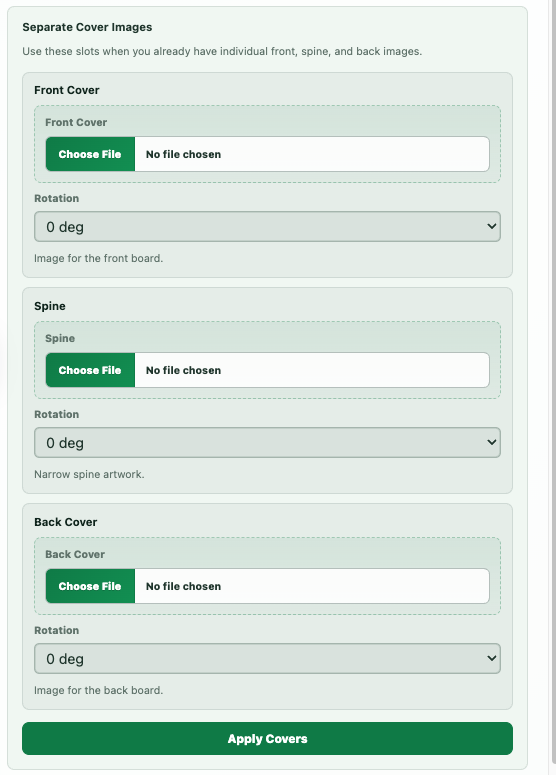
Cover Split Images
Cover split controls prepare separate cover image pieces for the native previewer and marketing scene.
Use these when cover artwork needs to be separated into front, spine, or back-facing pieces.
Review split images before capturing assets so the book surfaces match the source art.
This helps marketing captures show the same book structure you see in the creator.
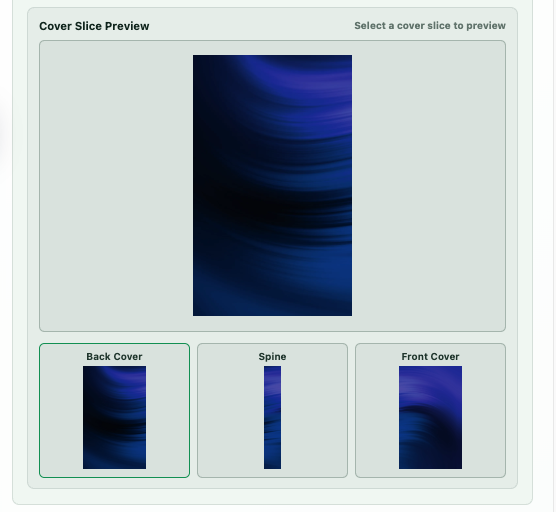
Cover Slice Preview
Cover slice preview helps you inspect how cover artwork is being divided across visible book surfaces.
Use this as a quick quality check after cover split images are prepared.
Look for missing edges, misaligned spine areas, or unexpected crops.
Adjust cover setup before exporting campaign assets.
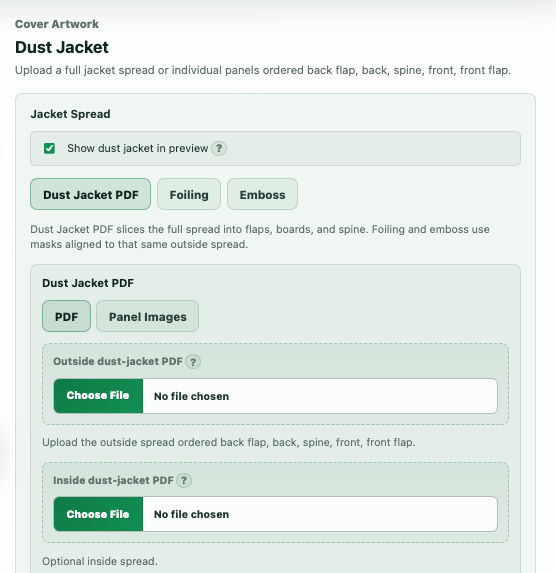
Dust Jacket
Dust Jacket controls let hardback projects show jacket artwork and jacket motion in marketing captures.
Use this when the campaign should show the jacketed version of the book.
Combine with preview animation controls for open or closed jacket states.
Confirm jacket visibility before recording videos or GIFs.
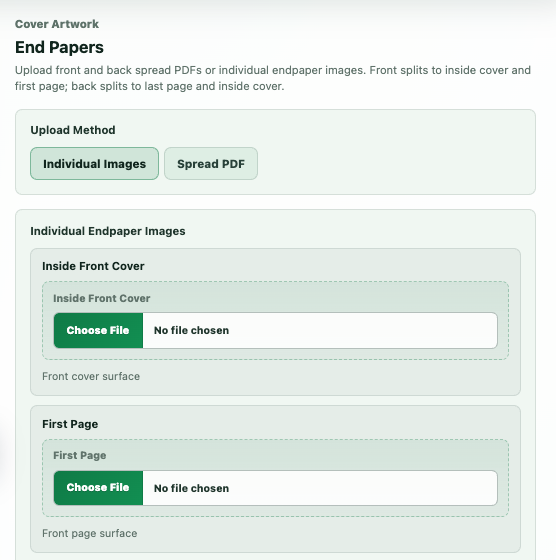
Endpapers
Endpaper controls support marketing views that show the inside cover treatment.
Use endpapers when hardback interior styling is part of the edition design.
Review the open-book preview state before capturing.
Keep endpaper settings aligned with the book motion selected for the capture.
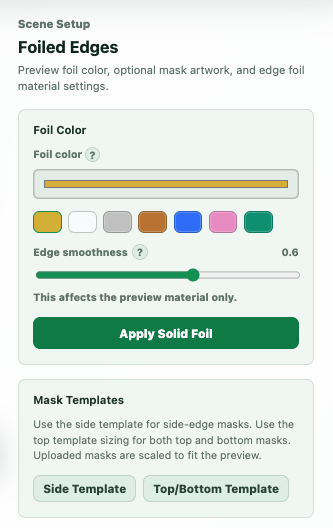
Foiled Edges
Foiled edge controls add metallic-looking edge treatments for marketing visuals.
Use this to create promotional renders that highlight a premium edge finish.
Check lighting and HDRI reflections so the foil effect reads clearly.
Marketing foil settings affect captures, not the proof-generation review process.
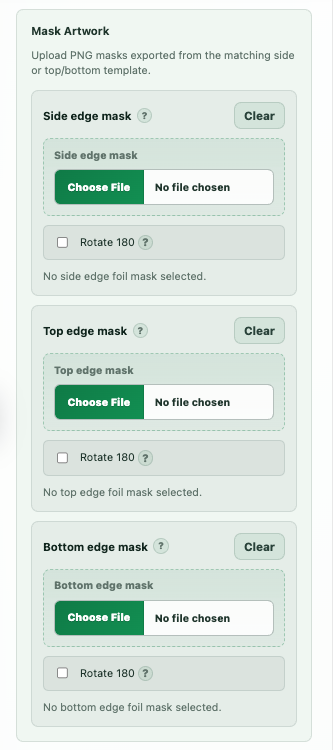
Foil Mask
Foil mask controls define where the metallic effect appears on the marketing edge treatment.
Use a mask when only part of the edge artwork should look foiled.
Review the mask against the current edge artwork before export.
Adjust the mask if the metallic areas hide important design details.
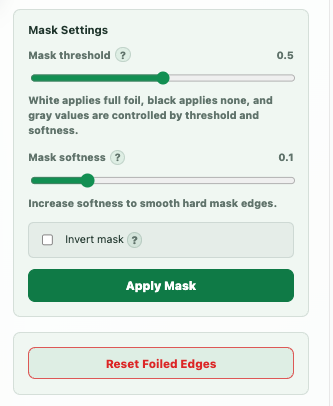
Foil Mask Settings
Foil mask settings tune the foil effect so it matches the intended campaign look.
Adjust the mask settings after the base foil mask is selected.
Use lighting and camera angles to check whether the effect is visible.
Keep the final scene consistent before capturing image, GIF, or movie outputs.
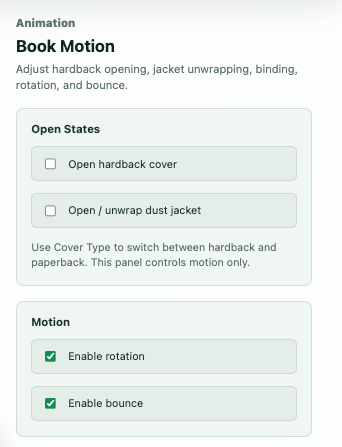
Book Motion
Book motion controls define how the book opens, rotates, bounces, or moves during animated captures.
Choose motion that shows the edge artwork without hiding the cover.
Use simpler motion for product shots and more expressive motion for teasers.
Videos and GIFs should use a motion preset that matches the selected canvas size.
Marketing Exports
Capture Images, GIFs, and Movies
Marketing exports are separated from scene setup so you can first prepare the look, then choose the right capture type. This area explains still images, GIFs, movies, saved recording recipes, and the captured asset library.
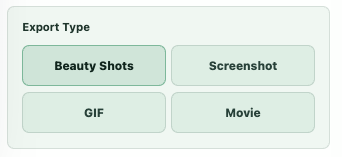
Beauty shots are quick still-image presets for common promotional angles.
Image and GIF controls capture reusable assets from the current native previewer scene.
Movie exports and capture catalogs use saved recording instructions so scripted videos can be regenerated consistently.
Captured assets can be reviewed individually and downloaded for launch, teaser, ad, and social workflows.
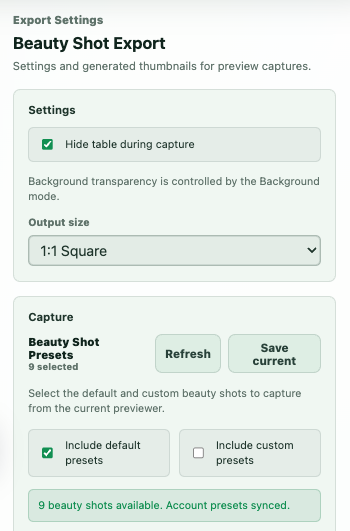
Beauty Shots
Beauty shots are quick still-image presets for common promotional angles.
Use beauty shots when you need polished still images quickly.
Choose the preset that best shows the edge artwork, cover, or book shape.
Review the scene setup first because beauty shots inherit the current lighting, background, and canvas choices.
Image and GIF Exports
Use these controls to capture still images and animated GIFs from the current scene.
Images are best for product listings, static posts, ads, and announcement graphics.
GIFs are useful for short movement previews without full video editing.
Choose the canvas and animation settings before exporting so the output matches the target channel.
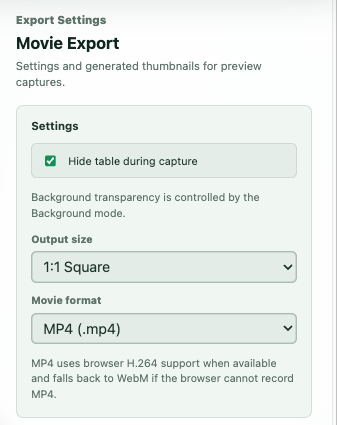
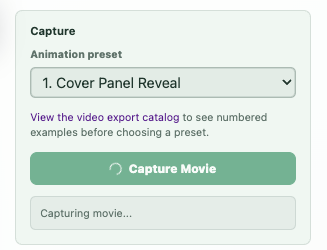
Movie Export
Movie exports render scripted camera and scene changes from the current previewer setup.
Use movie exports for richer launch videos, teasers, reels, and ad clips.
Choose the recording recipe, canvas, and current scene before capture.
Videos should be reviewed after export because motion, lighting, and framing all affect the final result.
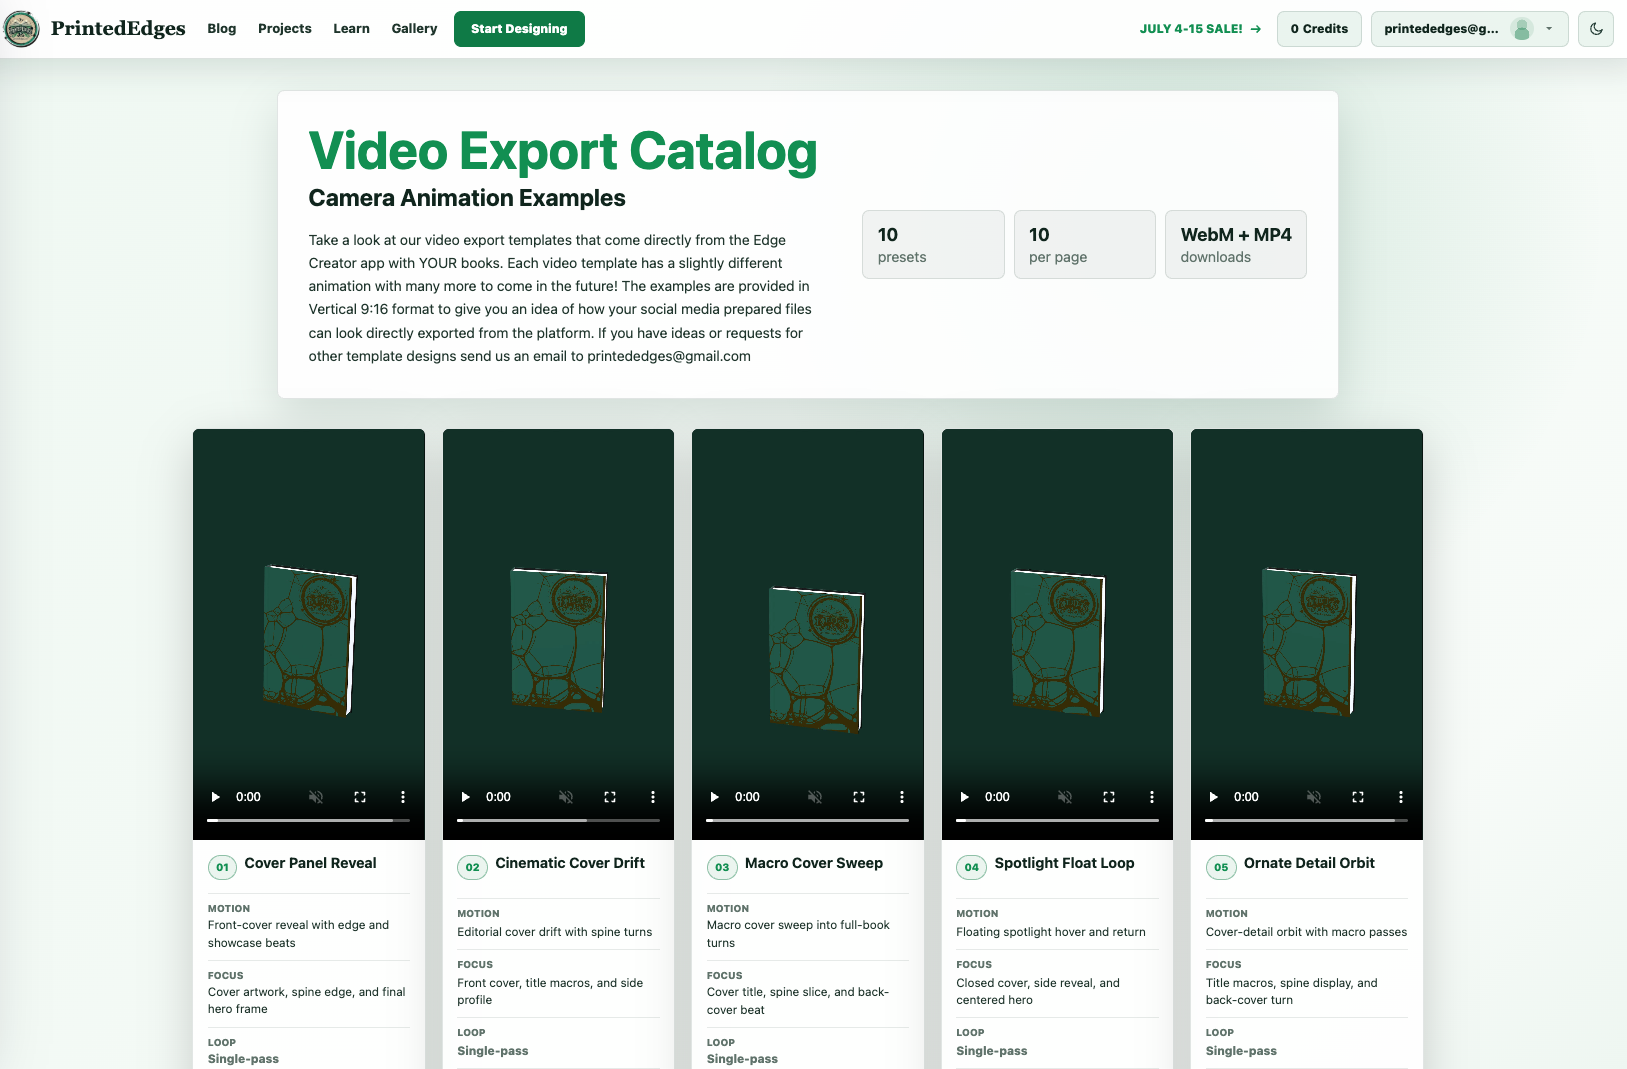
Video Export Catalog
The export catalog lists available video recipes and the outputs that can be generated.
Use this list to choose which saved video recipe should be rendered.
Recipes can define camera movement, animation timing, lighting changes, and scene settings.
Keeping recipes in a catalog makes future video versions easier to regenerate consistently.
Movie Capture Catalog
The movie capture catalog tracks the recorded assets created from the configured export scripts.
Use this area to review completed or available movie captures.
Cataloged captures help you compare versions without losing the export history.
This also supports regenerating videos from the same scripted capture setup later.
Captured Assets
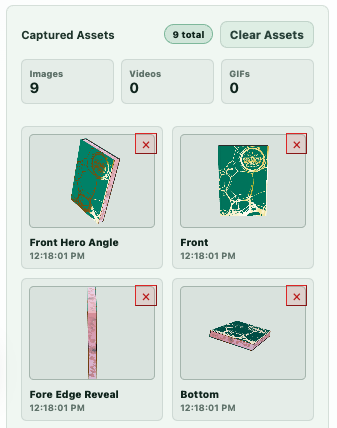
Captured assets collect completed screenshots, beauty shots, GIFs, and movies for review or download.
Review captured output before using it in campaign material.
Download individual captures when only one asset is needed.
Use the ZIP download when collecting a full set of campaign assets.
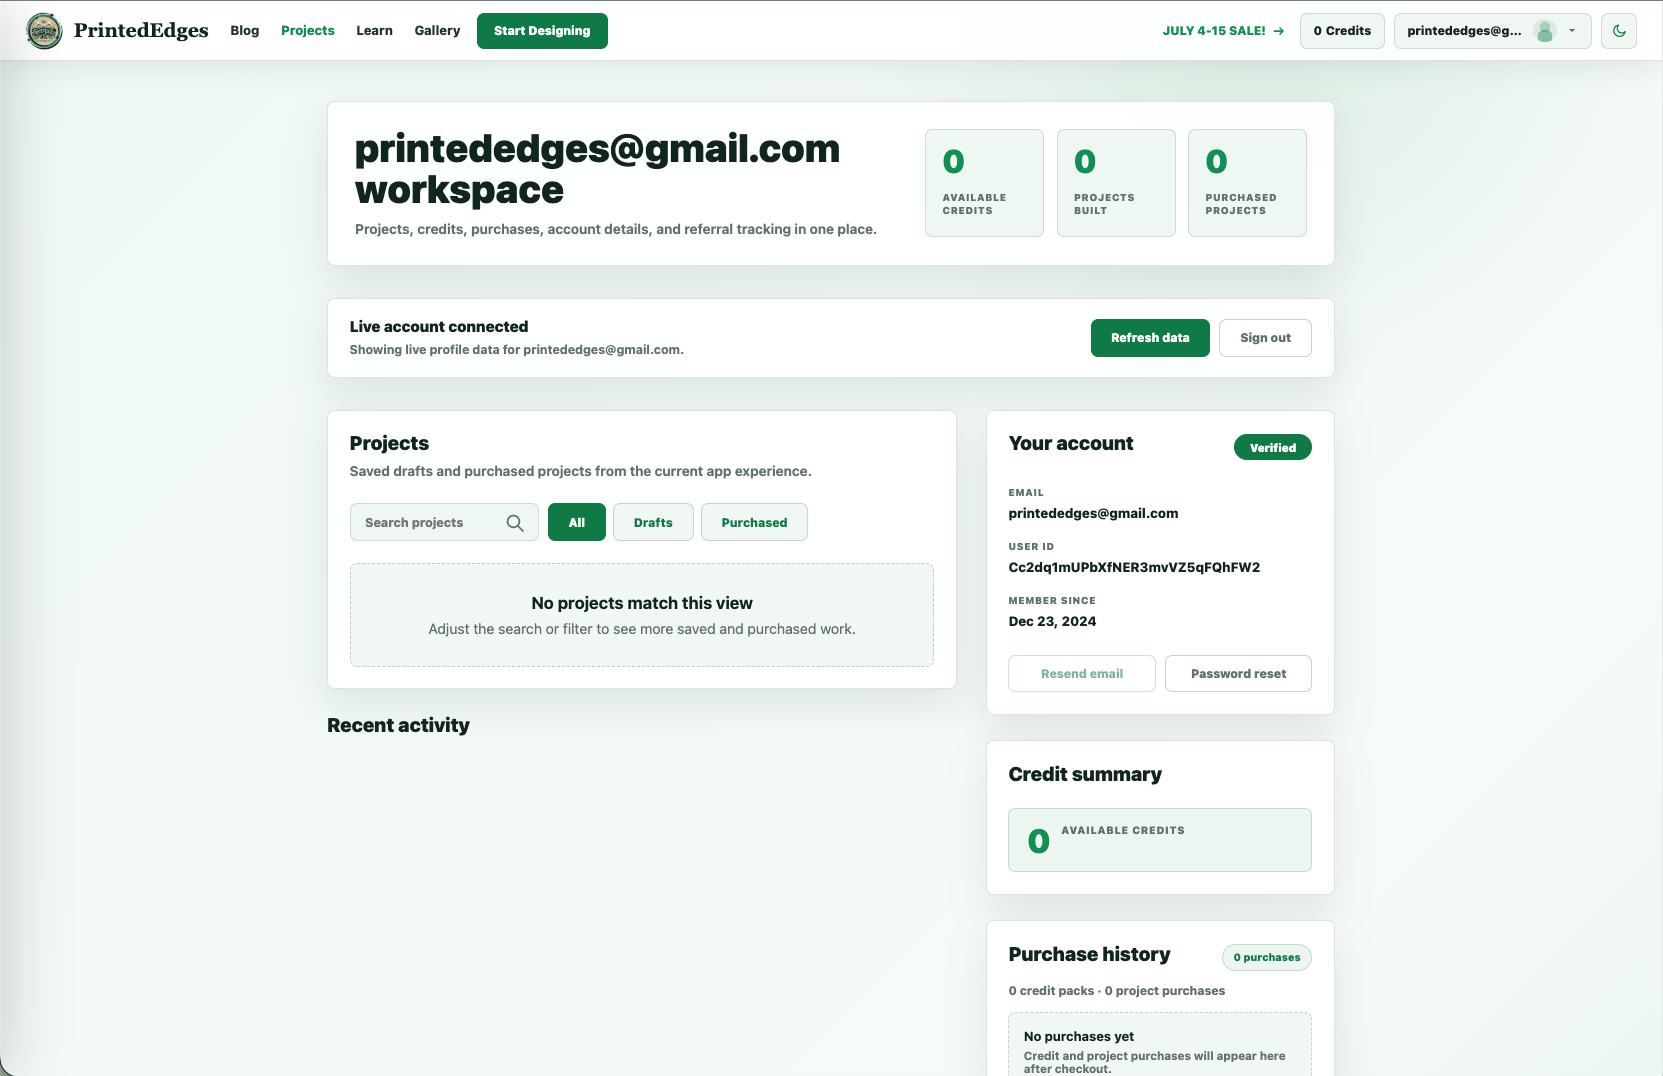
Project Profile
Find Projects, Files, and Activity
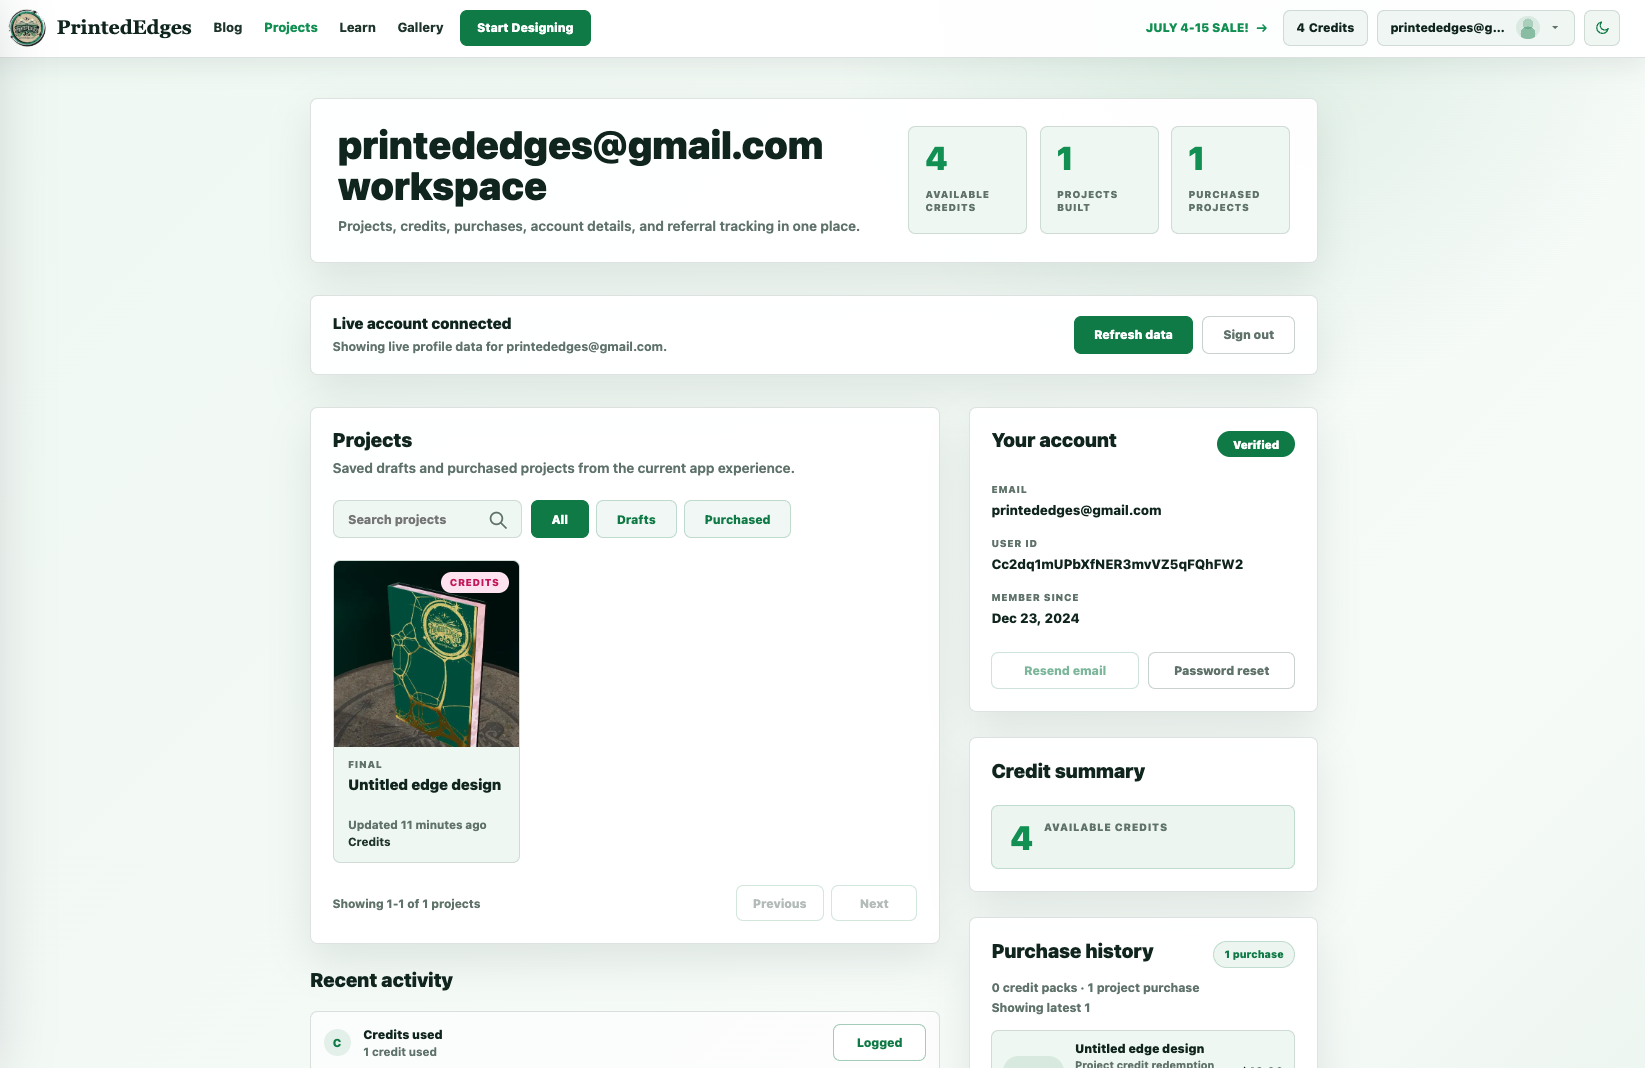
The profile workspace is the long-term project dashboard after saving, purchase, proof generation, or PDF validation. This is also where account-required actions connect back to your account.
You can start designing before signing in, but Save for Later, purchasing, credit checkout, and long-term project access require an account.
The projects panel helps you distinguish drafts, saved work, purchased files, and final downloads quickly.
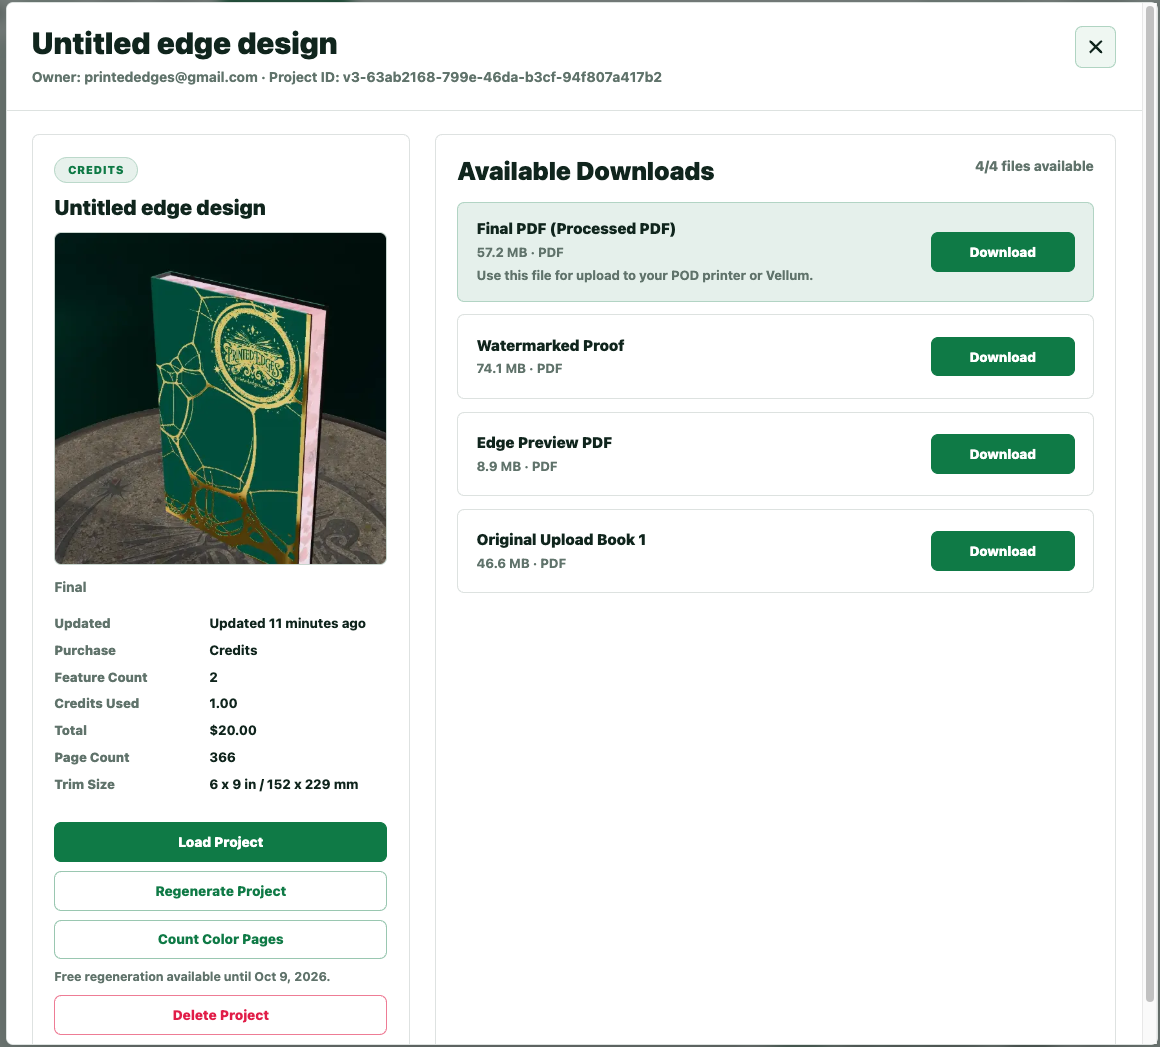
Project detail panels collect your generated files, source assets, and activity into one review surface.
The profile also gives you access to the PDF Validator, referral link, credit history, and recent account activity.
Profile Workspace
The profile workspace is where saved projects, purchased projects, account tools, and project activity live after the creator session.
Use this page to resume saved work or return to completed purchases.
Account identity keeps drafts, credits, final files, and activity tied to the right account.
This is the main long-term access point after leaving the creator.
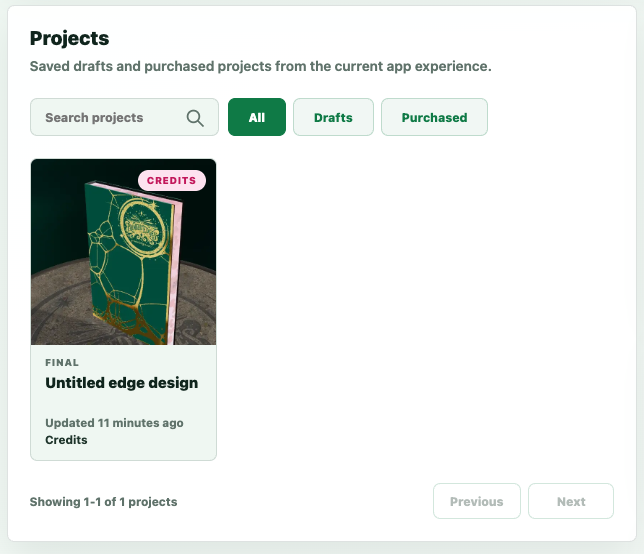
Projects Panel
The projects panel helps you find drafts, saved work, purchased files, and recent project states.
Saved projects can be reopened from here after using Save for Later.
Purchased projects should make final download access easy to find.
Use project cards to distinguish work that still needs review from work that has been finalized.
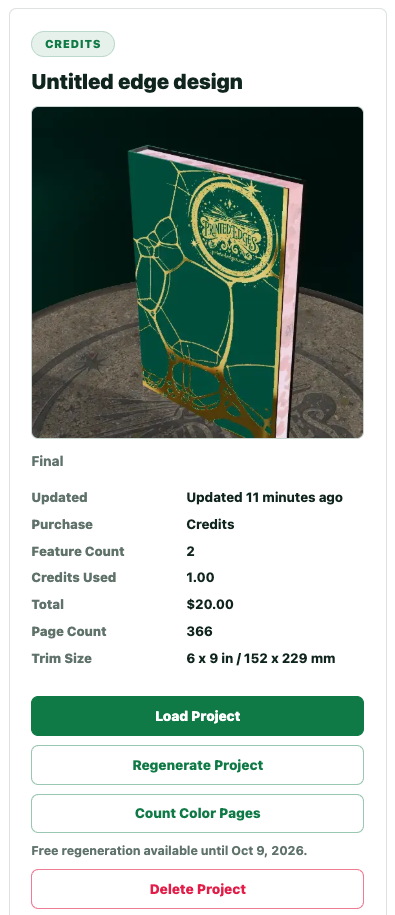
Project Detail
Project details give you a focused view of one selected project.
Use this panel to review project metadata and status.
This is where you can confirm which project you are opening or downloading from.
Details should make saved, proofed, and purchased states clear.
Files
The files area collects available project downloads and generated outputs.
Final purchased files should remain accessible here.
Proof and source-related outputs can be grouped with the selected project.
This helps you recover downloads later without returning to checkout.
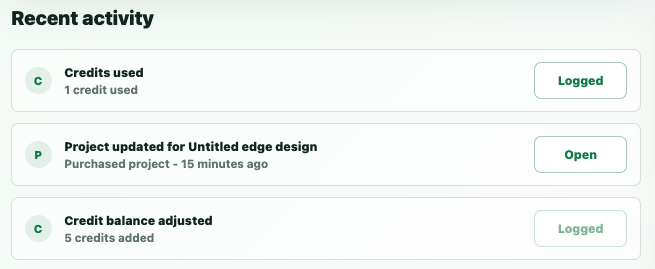
Recent Activity
Recent Activity gives you a timeline-style view of account and project events.
Use it to orient yourself after saves, proof generation, purchases, or downloads.
Activity is helpful when you return later and need to remember what happened.
Review this section when you want a quick account history without reopening every project.
Activity Downloads
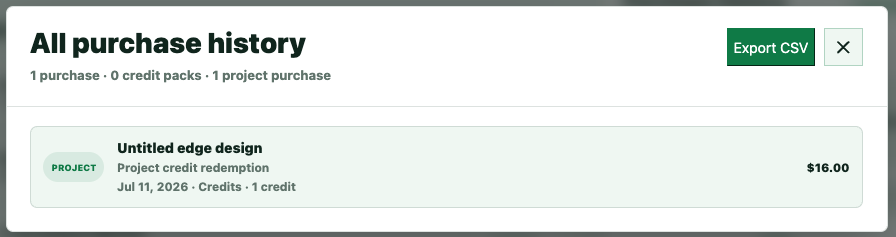
Use the purchase history and activity downloads to find receipts, credit purchases, project purchases, and recent file activity from your account.
Export your purchase history when you need a record of credit packs or project purchases.
Open recent activity when you need to find a download without searching through every project card.
Download labels help you tell the difference between proofs, final processed files, and purchase records.
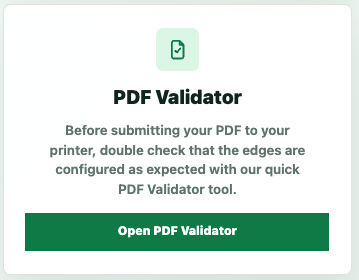
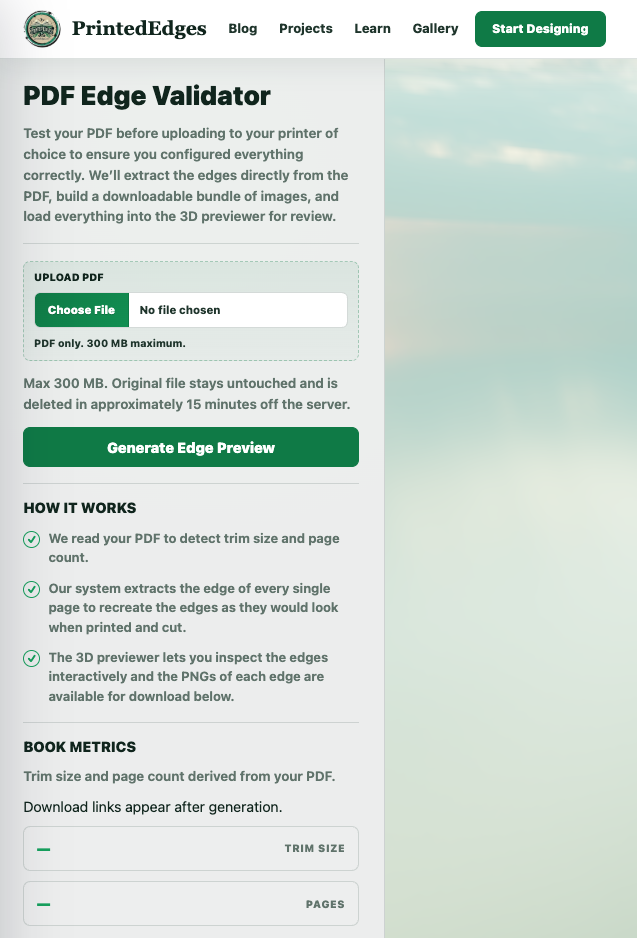
PDF Validator
The PDF Validator is hosted on the app service and can be opened from the profile workspace to inspect edge setup before printer submission.
Use it to double-check edge configuration before submitting files to a printer.
Open the validator from your profile whenever you want to review a PDF outside the creator flow.
The validator is optional, but it is strongly recommended before sending files to print.
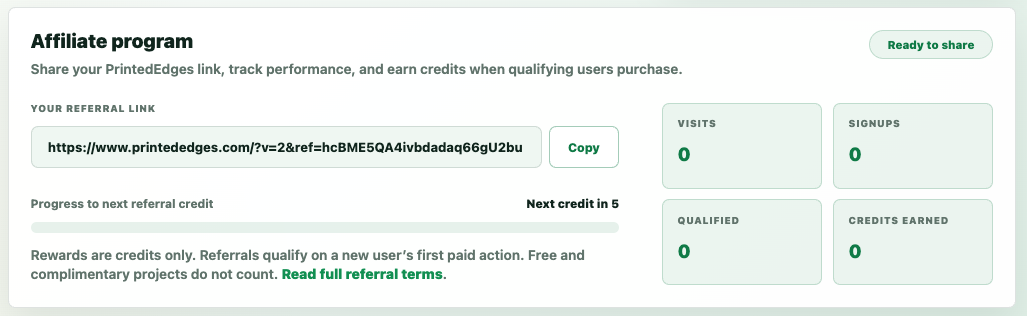
Share your PrintedEdges referral link from your profile and track visits, signups, qualified referrals, and earned credits.
A referral can qualify when a brand-new referred account completes its first paid action, such as buying credits or completing a paid project.
Free projects and complimentary projects do not count toward referral credits.
Rewards are issued as PrintedEdges credits: one credit is added automatically for every five qualified referrals.
Keep Learning
More PrintedEdges Resources
Visit the Learning page for more setup guides, read the blog for current product changes, and follow PrintedEdges on socials for behind-the-scenes progress and upcoming updates.